The Pinhole Lab Camera was designed around a 2½ x 4 inch sheet of paper, one eighth of an 8 x 10 sheet, with the idea to keep the cost of using it to a level appropriate to shrinking school budgets. What if you didn’t care about cost and were willing to trade a little inconvenience for a big negative?
The Model 2X is exactly twice the dimensions of the original. I didn’t have to redesign anything. It's just the
same PDF printed at 200% on a large format printer.
Although cost is no longer an issue, the pinhole lessons of recycling and use of common materials remain. It would take one heck of a cereal box to make this camera. If the template has been enlarged, the thickness of the material also has to be doubled if it was going to fit correctly. You need something a little stiffer for the larger sides of the camera to stay rigid.
Making Goldberry got me interested in the potential of corrugated cardboard. It’s ubiquitous in our e-shopping world, thicker than a cereal box and big boxes made out of it are common. The kids I used to work with gave me a carton from a 30 x 40 inch package of foam core, which was just enough.
Because there was so much surface to cover and the glue might start to dry before it got evenly spread, I used 3M Super 77 spray adhesive to attach the template to the cardboard. Otherwise it was just like building the original.
The dimensions have doubled so the negative is 5 x 8 inches, 4 times the area, exactly half a sheet of paper of course.
I stuck with .5mm pinholes made by completely piercing brass with a #10 darning needle because they're so
easy to make. That size is mathematically optimal at about 5½ inches but with this large negative a smaller pinhole will give more benefit than it will lose from suboptimal diffraction.
With a 1½ inch reducer and a 4 inch extension, I have pinhole distances of 3½ inches (71 x 90 degrees at f178), 5 inches (53 x 70 degrees at f254), 8 inches (34 x 53 degrees at f406) and 12 inches (23 x 36 degrees at f610).
I have a few projects in mind that would benefit from the higher resolution of the large negative that would require going out and about away from the darkroom.
To use this camera in the field, a changing bag is necessary to reload and to add or remove the accessories. Loading a box this big in a changing bag is a challenge. When adding or removing the reducer or extension, I had to put it into the bag to unload the negative, take it back out to make the adjustment and then put it back in the bag to reload. After some practice ahead of time, it was manageable doing this sitting on a building entrance stairs. It takes about 10 minutes.
The camera, the reducer and extension, the changing bag and a box of paper wouldn’t fit in even my largest backpack
and bike bag but it all went in my farmer’s market canvas bag. It’s all pretty light so it can hang over my handlebars if I ride carefully. It's not in the photo, but there was also a two-foot long piece of screen molding to use as a straight edge for viewfinding and of course, a roll of tape.
I printed it in January and built the thing in March. Being a little sick of the drab winter, I waited for more pleasant weather but got obsessed with a few other projects.
Once it got hot I couldn’t imagine sitting outside in a long-sleeved black T-shirt with my arms in a changing bag. Eventually, on a Saturday in late October, I finally went over to the University on a morning with bright sunshine, which seemed necessary working at f610 with ISO 5 paper.
I managed to make an exposure at each of the pinhole distances.
After another month wavering on whether to mix a whole quart of paper developer, this weekend I ended up using Rodinal 1:50. There was a lot of uneven development in the highlights. In an
interview with Marko Umicevic on the f/D blog, he described how he essentially does stand development with paper. I think I'm going to try it at 1:100, agitating a bit at the start and then letting them stand longer. Some experimenting around home, to get this right before setting off on the project I have in mind, sounds like a good idea.
All of these were done with the rising front pinhole.
Halsey Science center at eight inches.
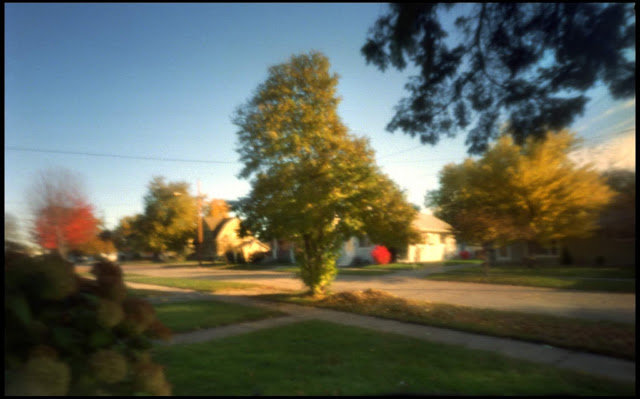
Just north a bit, a tree at three and a half inches.
Oviatt House at five inches.
And ironically, really overexposed at 12 inches and f610, The Fredric March Theatre.
I was sitting on the steps of Swart Hall loading the paper for this shot with my arms past my elbows inside the extremely full changing bag. The tripod with a piece of old board on it was a few feet away. A couple looking like junior faculty parked where I was planning to point the camera, came by carrying a large desktop computer, said "hi" and went by me into the building. Just another day on campus.
It was hard to get the paper straight in the camera and these big floppy sheets of paper really get beat up taping and removing them from the camera in these confined quarters. I'm going to make some kind of cardboard frame to hold the paper in place and gently remove it.
But for now it's probably going to have to wait until it's warm enough to sit outside in a jacket light enough to get my arms in the changing bag.


