It's nice to be able to take advantage of it when a friend buys a 3D printer and is looking everywhere for an excuse to make something.
Giles La Rock recently acquired one and was giving away things like multiple roll film canisters for 120 film. He has even printed a 6x12cm format camera (which uses a lens).
We had a casual conversation about applications for 3D printing. I have no interest in 3D-printed pinhole cameras, mainly because they're bigger and bulkier than my cardboard ones - and because it creeps me out a little to use a pinhole camera I haven't made. One idea we discussed was a film carrier for scanning with a digital camera. The ones I've used are very nicely made and convenient to use, but cost $300 for something that doesn't seem that complicated.
Several days later, I was thinking about the last step of turning a negative into a positive in workshops. I've used cardboard film holders before, but they require moving each frame individually between captures and sometimes a little taping. I idly searched Thingiverse and immediately found exactly what I was looking for.
I sent the link to Giles and he showed up at my exhibit during the gallery walk with all the parts in a zip lock bag. Nice to get presents at an opening.
He didn't have the prescribed magnets needed to finish it. I went to buy some. They're all made in China!! Available only in lots of hundreds, with shipping more than the price, arrival times weeks away. Then after scrolling down the page a while, there was a listing from Amazon for 80 with free 2-day shipping. I'm sure Giles can find a use for the ones I don't need.

It's best to use it with an uncut roll of film. It has to be past the mask to roll properly. It will hold a cut edge right at the end of the opening, but you have to open it and move it into the slot to get it to go farther.

Eight #61 O-rings drive the film more effectively than I expected.
It worked very well. My only quibble is that it's very light and has to be realigned all the time. I could probably attach it to the light pad with rubber bands or tape to keep it still.
Savvy readers might have noticed that in that top picture, that's a 1970s 55mm Micro-Nikkor with the "rabbit ears" still on it that's been modified for "AI," which stood for auto-indexing back then. So it's Automatic nothing. The camera is a Nikon D750, which is just before they included inverting a negative as an effect. With this lens, LIVE on the LED panel won't work properly, so focusing has to be done with the viewfinder. I'm not much good at judging a negative, but it does index with the meter, so it's stopped down as far as it goes for depth-of-field with the meter on average. The image inverted in Photoshop is always brighter than I expect, but the histogram shows there's lots of data from the RAW format image file and can easily be spread back to full range with Levels (and burning and dodging naturally). By the way, couldn't Adobe make inverting a negative an option of that feature-rich RAW import function?
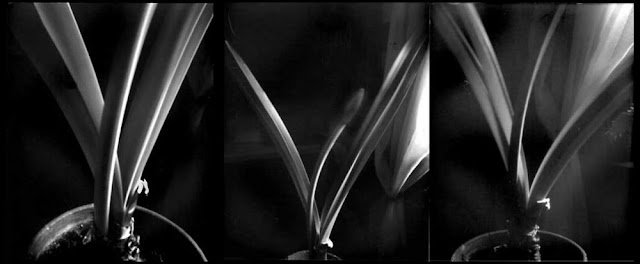
The test roll was Kentmere 400, overexposed most of the time.
My normal route to the lake passes an old factory, half of which has been converted into apartments. The half I go past has been a neglected eyesore, but it looks like they trimmed the weeds and washed the walls recently.
Bricked up passages into what must have been more of the building.
Another closed opening with some reinforcing iron in the wall.

Windows closed in by metal paneling.
This one looks like it was glass blocks that have been painted over.

The theme this month for the Fox Valley Photography Group is Shapes.
Looking down Nevada Avenue toward the lake.

The sky over the Yacht Club breakwater.
The corner of the City Center courtyard. This one looks like the scanning camera might have been out of focus, but I can see the grain, and I remember whacking the pinhole camera closing the shutter.

The Gibson Social Club with the Mosque in the misty background.
The entrance to the second floor of an iconic Oshkosh landmark, The Webster Block.
The meter-wide "fairy passage" with a mural covering one side between two mid-century single-story stores.
Capturing negatives with a digital SLR is notably
much faster than using a flatbed scanner. The resolution is about the same as I use with the scanner (which could go much higher). The quality of the images seems a little different in a way that I can't quite put my finger on, but if I could adjust the camera with an inverted image, that probably would change. There seemed to be much less issues with dust, but that could be just the luck of what the humidity was when the negatives were drying.
My scanner is located in a convenient, comfortable space so I'm not sure it would be worth it to set up for DSLR capture every time, but if I get to do another workshop where I have to provide for digital capture of negatives, this is really going to make things quicker and easier. Thanks a lot, Giles.
The EyePA 30 has .23mm pinholes on the axis and 8mm above it, 30mm from a 6x6cm frame. The Kentmere 400 was semi-stand developed in Rodinal 1:100.
Hmmm, there are lots of plans for desktop tripods on Thingiverse.
Happy
Worldwide Pinhole Photography Day this weekend.