Friday, December 18, 2020

Struggling with Ultrawide Angle with Paper Negatives

When I was having trouble with the widest setting on the 4x5 Pinhole Lab Camera, I said I wasn’t too perturbed because I didn’t particularly like the most extreme wide angles of view. Whenever I hear myself say something like that, I end up worrying that it’s because I haven’t really given it a proper try. I decided I should see if I could experience the charm of the ultra wide angle. It did not go well.

I had intended the widest option on the Pinhole Lab Camera to be 36mm but I messed up when cutting and glueing the guides which make up the slots the film plane slides into. The last one had to be trimmed a little to fit. The image plane in that slot ended up being only 30mm away from the pinhole. 

Also, when I glued the shutter on the outside, I didn’t quite get it positioned so the pinholes were exactly in the center of the opening. One side of the shutter blocked part of the image. I pried it off and reglued it more carefully so the pinhole was in the center, but that doesn’t seemed to have solved anything.

In my youth, my favorite lens was my Canon FD 20mm f2.8, so I have some idea of what was then considered ultra-wide angle. This thing would be equivalent to a 9mm lens on a 35mm camera.

At 30mm on a 4x5 (100 x125mm) negative, Mr. Pinhole says the image circle is only 2.25 inches (60mm). That’s some pretty extreme vignetting especially when using black and white photographic paper which can be very high contrast. Another thing I forgot about was the spectral response of the paper. Mickey and Minnie’s red car, under a spotlight, wasn’t the best choice to try things out. 


A difficulty with extreme wide angle is that it’s almost impossible to previsualize what you’re photographing. The angle of view at this distance to the pinhole is 129 degrees. The human field of view is actually wider than that, but 129 degrees is wider than your brain can frame into a picture. I thought I was looking straight at Mickey and Minnie in the car, but from the point of view of the pinhole, it’s only looking straight at the center. It’s looking significantly up at the top of the frame and down at the bottom. The extreme relative changes in size with distance is also hard to conceptualize. The hood ornament on top the grill is quite small, but is big enough in the image to completely obscure Mickey.

I tried a red pear, an apple and a lemon in a sunbeam on the kitchen table. Not another great choice.


I tried a much lower contrast subject. Now I can see that the shutter was still blocking part of the image on the bottom, but again, it faded to black before I could tell if the sides were unobstucted.


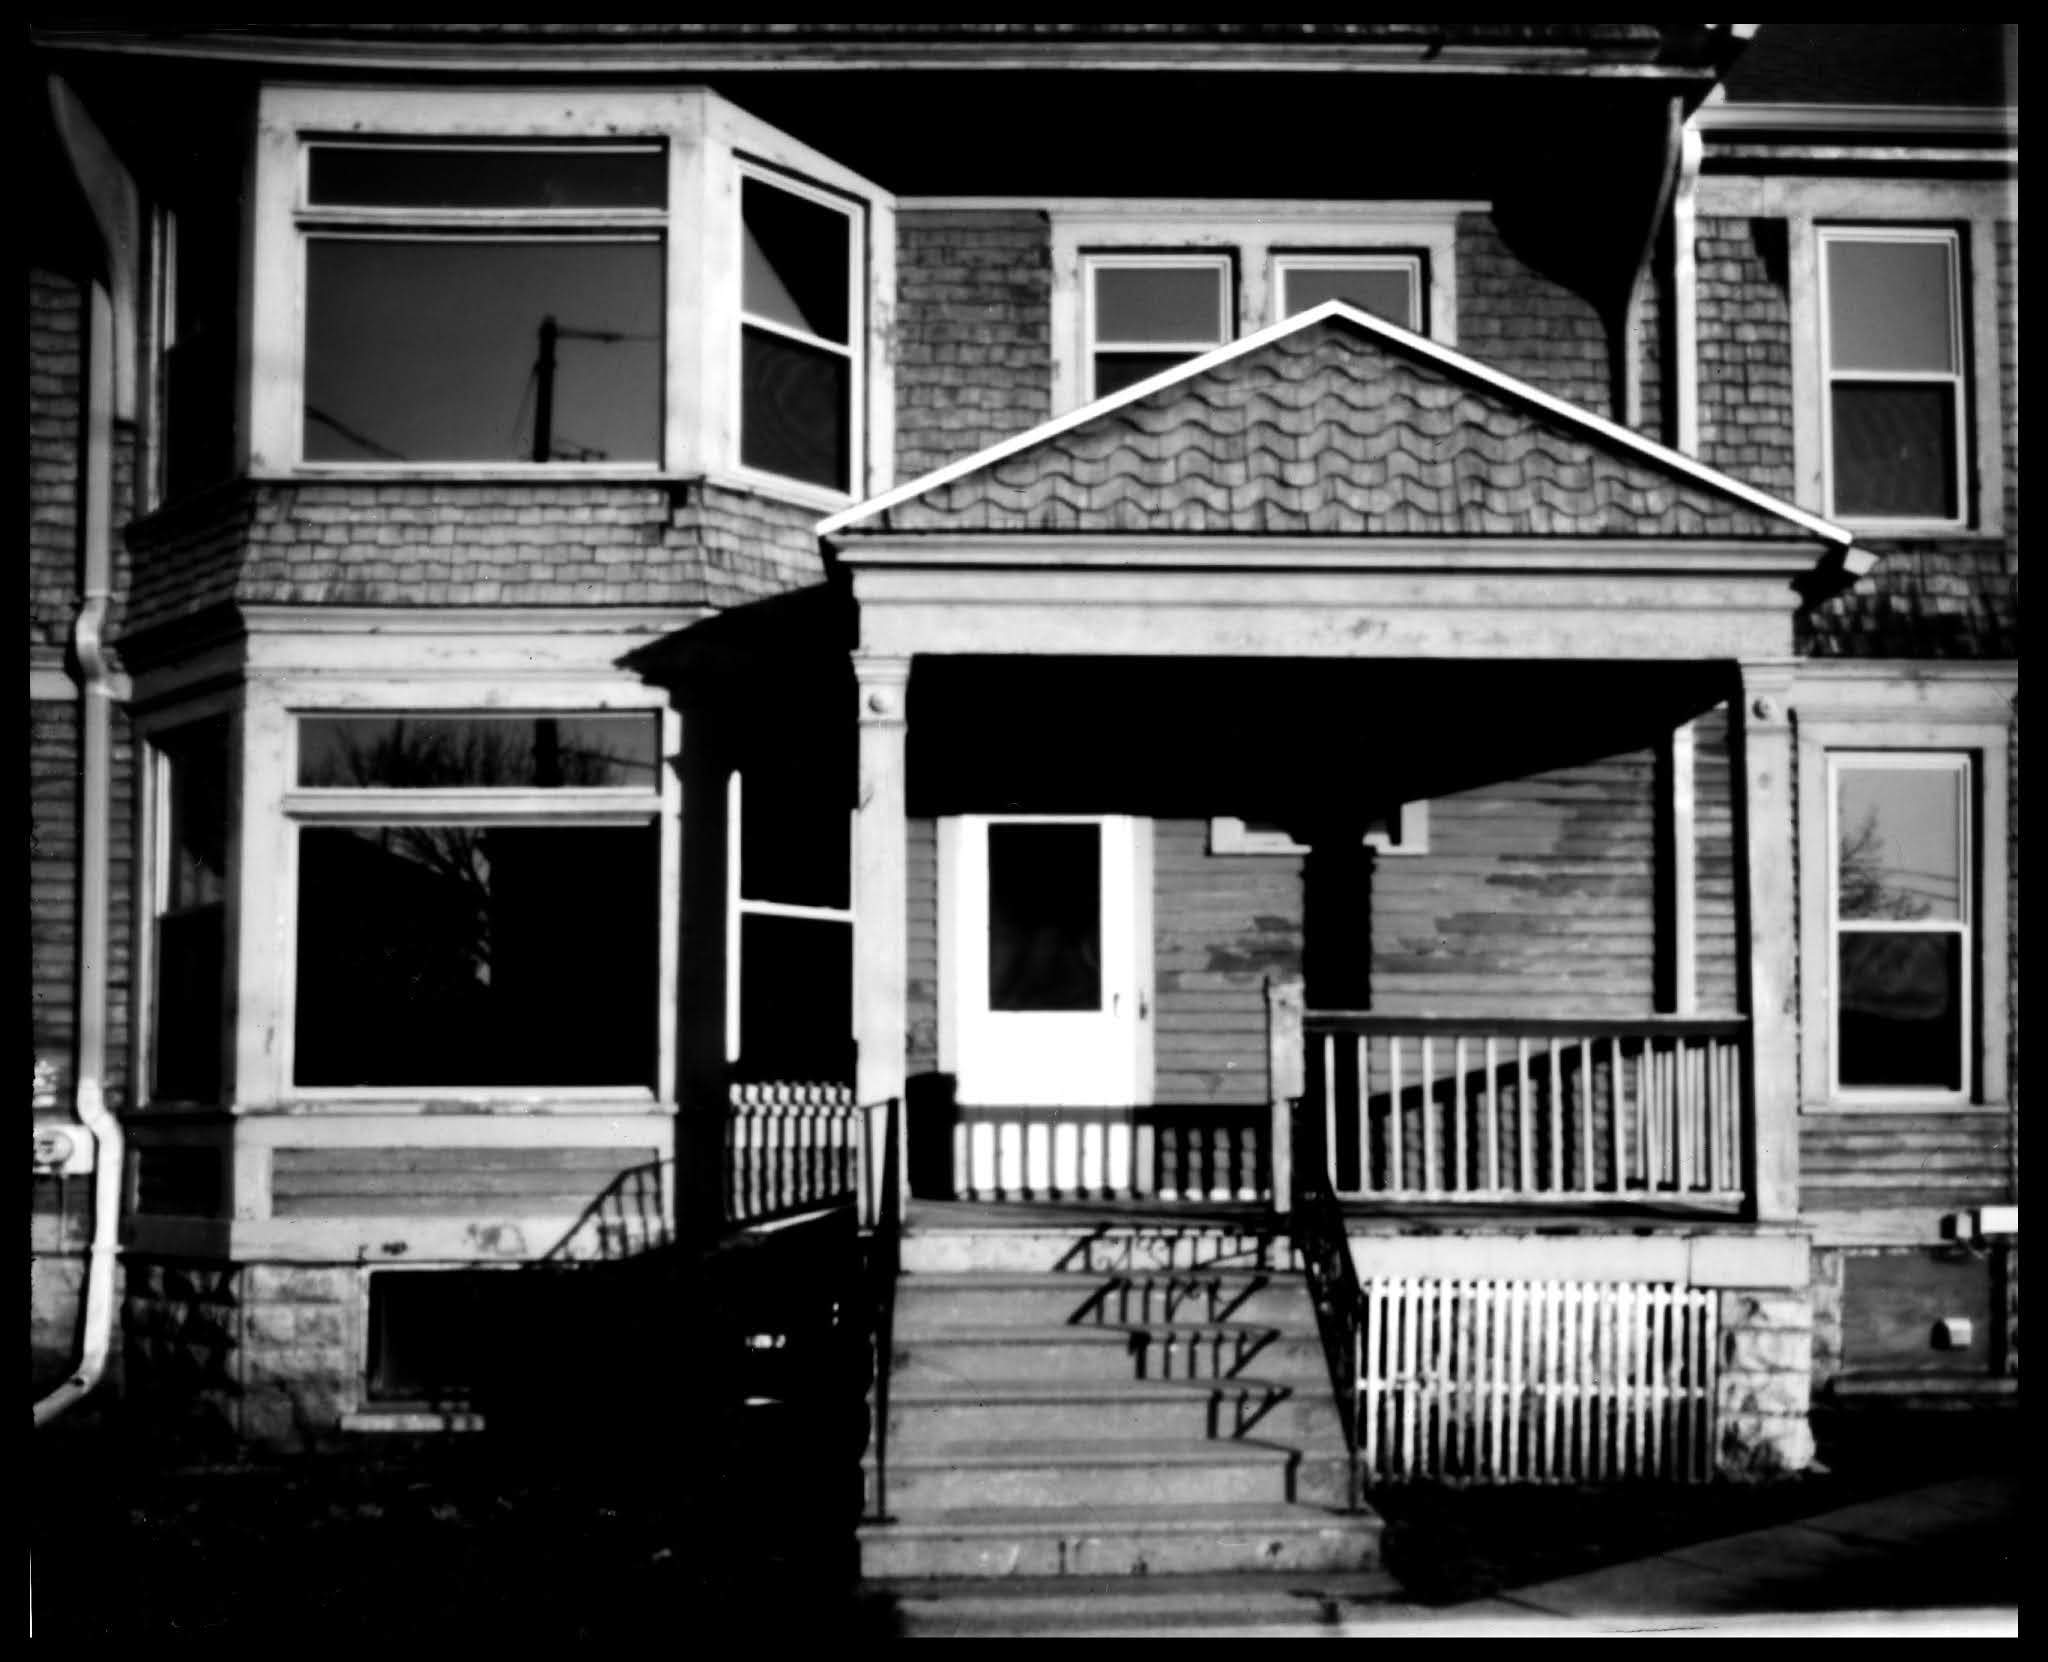
What I needed was a scene that was dark in the center and bright on the outsides. I took the fruit out on the porch, and that worked a little better with the vignetting and now I could definitely see the shutter was still a problem. However, I think I see a glimpse of the attraction of the extreme wide angle with this one.


I went outside to see if I could learn anything from a more uniformly illuminated subject. A wide angle is handy when you can’t get very far away from your subject. I could get the entire entrance of the First National Bank building while still on the narrow side walk, but the vignetting kind of defeats the purpose. This one is also with the rising front.


Even if you could overcome the vignetting, it’s really a struggle to get close enough to things to fill the frame. I was going for the novelty effect here. It’s not as crazy as I thought it would be. The camera in this case is about an inch from my nose and the tips of my fingers are actually under the camera.


If the shutter is blocking that much of the frame, I can’t really get interested in experimenting further. So what can I do about this?

I could make the opening for the shutter bigger. Remember, however, that I made this camera not specifically for wide angle, but to work with 4x5 negatives at a variety of angles of view, and it’s fine at the 3, 4.5 and 6 inch distances.

A limiting factor to how wide an opening in the shutter I can get is the distance between the axial and rising pinholes. I picked 15mm somewhat randomly. James Guerin uses a 31mm difference in his 4x5 Reality So Subtle camera at 36mm. I could probably making the rise a bit greater. That would require modifying the box and making a new shutter. Maybe we’ll have to get more potato chips.

Another option is to back off to a less extreme angle. That would make the shutter blockage less of a problem and the vignetting would be less extreme so maybe I could make use of the entire frame. I pried off that front guide I had trimmed to fit and the second one and switched their order. Now the widest angle slot is at 38mm, still pretty darn wide on a 4x5 negative. I also trimmed a little off the shutter holes.

One good thing I learned was that the 28 year old paper I had left from my 1992 grant was still workable as a negative. The last three images were done with it. There’s a little background fogging, but that may help to control contrast, kind of like very slow pre-flashing.


Thursday, December 3, 2020

A 4x5 Pinhole Lab Camera


As usual, several things led me in this direction.
  • My recent post about The Pinhole of Nature got me a little nostalgic about making photographs with 4x5 paper negatives.
  • I didn’t want to have to carry several different cameras with me in order to use different angles of view, and I was happy with how the new Pinhole Lab Camera solved that.
  • 4x5 is a very popular format so others might be interested in this camera if it were available in that format.
  • I recently discovered that when I did a workshop for teachers in 2016, I had cut quite a few more sheets of paper down to 4x5 than they actually used and I still had about 100 left in my darkroom. Just yesterday I discovered that about 500 sheets of 4x5 paper from my grant project in 1992 were still good. Developed for three minutes they showed some fogging but after only 90 seconds (the recommended time) they looked completely clear. So I have lots of material for experimenting.
Of course it’s a little bigger than the original Pinhole Lab Camera. It takes a piece of cardboard 14 inches square to make the big boxes. The only packaging I could find that big were three-packs of Old Dutch Ripple Potato Chips. (Crisps to everyone outside of the U.S.) I had been saving one for awhile but I needed two, so I made the sacrifice and bought another box. We’ll find something to do with the chips. The new one was their special holiday packaging so to celebrate the season I put the printing on the outside. It’s also a nod to Pinhole Day colleague Tom Miller who has almost exclusively used Jay’s Potato Chip cans for cameras for years.


It is a little tight in the changing bag but not too bad after a little practice.

As with the smaller version there are slots to put the image plane at four distances: 
  • 1.5 inches (38mm) for a 106 x 118 degree angle of view, 
  • 3 inches (76mm) for a 67 x 79 degree angle of view
  • 4.5 inches (114mm) for a 47 x 58 degree angle of view, and
  • 6 inches (152mm) for a 36 x 45 degree angle of view.
I think most people consider 6 inches (150mm) “normal” for the 4x5 format.


There’s also a slot at the front to slide in a pinhole mount.  I made two sets: .33mm and .55mm. I was trying for .3mm but .33mm was the first matched set I came up with. The hole made by fully piercing the metal with a #10 quilting needle is .55mm, which is extraordinarily easy to do.

At 6 inches with the .55mm pinhole, a lion in front of the public library.


Some frosty leaves in the back yard, again at 6 inches with the .55mm pinhole.


The optimal pinhole size for this distances is .52mm, so .33mm is really small but the distance to the subject is also a variable in those equations. I tried the small pinholes about 6 inches from this spider plant, and the smaller size does seem to work for closeups. We’re now at f462 so there’s a cost in exposure time to this added sharpness.


The calculated optimum for 4.5 inches is .45mm. This is with the .33mm pinhole. An arrangement of three buildings whose fronts have classical elements.


At 4.5 inches with the .55mm pinhole. An old shingled Victorian house, empty and with a huge sign in front indicating it’s available for commercial development.


At 3 inches, the equations say .36mm is optimal. This is with the .33mm pinhole. The old Post Office on Washington Avenue. These windows are the local office of our conspiracy-minded Senator, Ron Johnson. His staff probably thought I was surveilling them with a mind ray.


My neighbor’s garage at 3 inches with the .55mm pinhole. I’m always surprised how little difference it makes using these suboptimal pinholes. The lesson I get is that with these large negatives, you could use whichever size pinhole would give you the most convenient exposure times for your conditions.


At 1.25 inches, once again I had trouble with the shutter getting in the way. This one was with the .33mm pinhole.


Just out of curiosity, I tried the 1.25 inch distance with the .55mm pinhole and the rising front. The shutter also got in the way on the top.


So explain this to me. For the stairs of the Library, despite a little fogging in the upper left corner, the whole frame is exposed.


I’m not too concerned about this shutter problem. I know these extreme wide angles are very popular but to me it’s kind of a novelty effect. It turns out that when I put the rubber bands on to clamp it down, they pulled the shutter out of alignment (I’ve warned you about this). I had to quickly try to slide it back into it’s proper position before the glue dried. It looks like I got it a couple millimeters to the right of where I wanted it. I may try to pry it off and make another attempt to see if I can get the whole frame in at the shortest distance.


All the pinhole images were done on Arista.edu Grade 2 semi-matte paper developed in Arista paper developer.