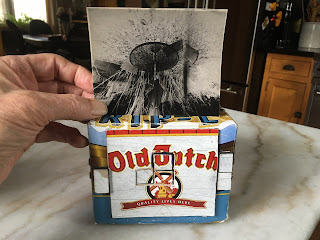
Reporting on my learning experience with the widest setting on the 4x5 Pinhole Lab Camera, I have to rely on that most common of clichés, there’s good news and bad news.
In the last episode, I was somewhat overwhelmed by the extreme vignetting and frustrated that the shutter obscured a good part of the image. I adjusted the internal guides for the film plane so that instead of 30mm, the shortest setting is now at 38mm, and trimmed as much of the shutters as possible and still keep the pinhole obscured when it was closed.
I’m happy to report that for the axial pinhole at least, the entire 4x5 frame is illuminated and the vignetting is reduced to the point where burning and dodging for most scenes is adequate to get edge to edge detail.
The bad news is that a mysterious light leak has appeared. It’s in the camera because it appears in exactly the same place in most of the negatives. I couldn’t see it in any of the last two batches of negatives. There were some fogged negatives in the first group. I ascribed it to a slightly ajar darkroom door when putting the paper in the box I use in the changing bag. It could, however, have been extremely overexposed versions of this leak farther back in the camera.
It is kind of mysterious. The way the pattern spreads, it looks like it might be coming from the top of the image, i.e. the bottom of the camera.
The cardboard in that corner did crack when I folded it so maybe that thinned it out. The inside is painted black and it’s a double layer everywhere including both the top and bottom. There is also a spot where the two lower pinhole brasses overlap which could form some kind of light pipe that beams onto the negative.
I have put opaque tape over all these possibilities.
In dimmer circumstances, there isn’t a trace of it. This was done about 3:45pm on a cloudy day just after the solstice. Pinhole Assist said 27 minutes, but it had gotten so dark after that much time, I turned on the porch and garage lights and left it for another 3 hours.
Another long exposure from the corner of the sun room. This was about 11 in the morning. After I opened the shutter it kept getting darker and eventually it snowed. I left the shutter open until 3 pm.
An issue from the last post involved a picture of Mickey and Minnie Mouse where their position under a spot light and the red car they were in was about the worst situation when faced with extreme vignetting with photo paper negatives. I realized there were two spotlights under the range hood and if I centered the image between them I would have the dark center with the brighter sides that would best counteract the vignetting. The red cookie jar on the right again illustrates the spectral response of the paper.
For this vertical menacing portrait of the gargoyle, I wanted a lower point of view than the tripod would go. I used the off-axis pinhole but with the camera oriented with it below the axis for a falling front effect. The shutter covering the axial pinhole still obscured the bottom of the image and again with the light leak.
The rest of these also exhibited the light leak but with burning-in and some use of the clone tool I could minimize it’s appearance to better appreciate the composition. I think I may be getting the hang of the ultra wide angle.
This large dark bush, just after the snowfall, against the front of the school lit by the low winter sun, seemed like a good candidate to manage the vignetting.
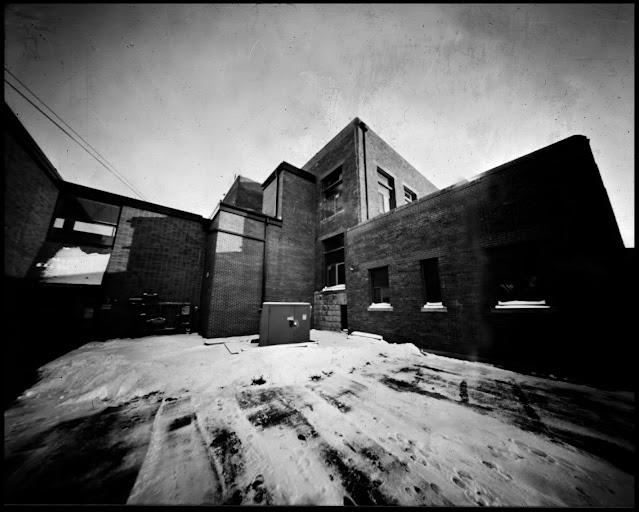
The joint where the 1930’s elementary school joins the 1970’s addition. I liked the way the sun defined the planes of the building and thought I could get away with the dark sides if the sky and the snowy parking area defined the width of the image.
I still really have a hard time previsualizing the image. Being this close to the tree, it seemed like it was filling my field of vision but the top of the image includes quite a bit of sky over the top branches. The converging (if pointing up) and diverging (if pointed down) verticals haven’t been really bothering me, but with this one it’s kind of distracting with the slightly off center tree seeming to lean over.
The point of the off-axis pinhole is to keep those verticals straight so I did one with the rising front and that worked fairly well. The shutter is out of the way in this arrangement as well.
There is one mystery I can’t really figure out. If you look roughly where the light leak is, it appears there is a double image of the right side of the building and the stairway. This isn’t some clumsy work with the clone tool, it’s actually in the negative. I supposed I could have briefly accidentally opened the shutter while I was adjusting the pointing, but it’s only in that narrow band and doesn’t extend all the way to edge of the negative. I suppose it’s possible that whatever hole was creating the light leak was partially covered in this case and created a small enough aperture to form the second image.
All these were done with the glossy Ilford Multigrade III RC Rapid from my 1992 grant project developed in Caffenol for 2 minutes.


No comments:
Post a Comment