Thursday, December 24, 2015

The Populist.

There comes a time when one has to face up to facts and accept that you're just hooked on something. When I started the Populist, I really didn't expect it to become my primary camera.  Is it vain to really like your own photographs? I guess I've always felt that way about my photographs, but what was coming out of what was basically user experience testing was something new. It was like somebody else was taking the pictures. Especially color. But it wasn't just color. I hesitate to called it the impressionistic quality lest Alfred Stieglitz returns from the grave to mock me for it. I experimented for a while with 120, but just didn't get any extra charge out of it (I am re-exploring 120 now though), and I always just had a Populist in my pocket anyway. That was another thing that was a revelation.  Having a camera in your pocket all the time.  While everyone else was experiencing the cell phone camera revolution, I was going through the same thing with a pinhole camera, although I fancy myself more as Brassaï, Kertész or Robert Frank.  Out there among 'em with a Leica M2.

So after about a year, I decided to make one specifically for me. If you hear me referring to the Populist, it's usually this specific camera I'm talking about.


About the only difference from any other Populist is that it's made from some really cheap twenty-five year old black 4-ply Railroad Board, Dick Blick's economy brand sign boards.  I've always liked black body cameras.

The first change was to put a sort of handle at the top of the shutter to make it easier to slide open.

Next was covering it in 3M #235 opaque black photographic tape.  It's perfectly light-tight without it, but the card stock wears pretty fast, and doesn't do well with moisture.  #235 gives it an almost leatherette feeling and although 3M states it's not for outdoor use, it's fairly waterproof – enough to survive running out of a summer shower.

The Populist is supposed to be reliable, but also easy enough to make that anyone can do it. Sometime you have to compromise a bit. The shutter is one spot that happened. There's no mechanism for preventing the slider from coming out when you open it. Friction is the the only thing that keeps it from falling out in general. After losing a couple in the field, I first tried to glue a little stop to the bottom of the slider, but it kept breaking off when I pulled it open.

The next change, which I thought of while walking in the woods one day, was to tape a shaped piece of wire (from a paper clip) to the slider with part of it outside the channel. The tape is wrapped up both sides of the slider so it's not as unreliable as it sounds.  It was a kind of tricky operation with exacto knives and tweezers, but it held up for quite a few years.

Occasionally it would come loose and get in the image, and have to be reinstalled. Sometime last year it came off and I lost it, and about a week later lost the slider itself. So I pulled off the original shutter and replaced it with a three-layer shutter with appropriate stops and handle.


The winder is also just held in by friction. With most film cassettes a 3/8" dowel is just slightly too big and you have to sand it a little to fit, but once jammed into the film reel it takes a bit of a pull to get it out.  But not always, and after a couple of years I lost a couple of those in less than a month.


So I made a winder minder from a little strip of beverage can aluminum with a slot encased in several layers of 3M #235 hinged on to the side of the camera which is then held down by the rubber band.

The bottom of the camera where it attaches to the tripod wore pretty quickly, so I added a layer of thicker aluminum from the pop top of a rice noodle can. That's more durable, but it tends to get distorted by the tripod head and next time I happen to have the camera empty at home, I'm going to replace the mount with a bit of wood inside and a T-nut held on by screws.

Viewfinder lines are included on the printed pattern, but they wear pretty quickly too. 3D objects to line up are much better to imagine a line in space (like a gun sight), so after replacing these lines about four times, I added some beads from pins I got from Sarah's sewing kit and covered the rest of the camera with tape.  There was also the exposure chart on the back that was no longer readable, which I didn't really need anymore that got covered too.  By the way I just guess at exposures.  I only measure in the rarest of circumstances, although with my 120 experiments, I'm a lot more careful about that.

Most recently I cut a bike inner tube apart to make black rubber bands and spray painted the winder to complete the professional black body look.

It's no surprise I continued the themes from the Precursers and Prototypes.

I take pictures around the house.


In the garden...


With the cats, mostly Spenser...


I take pictures on the road.


At Sarah's family farm in western Wisconsin...


At venues famous...


And mundane


At Mosquito Hill.


And of course, self-portraits.


Hey! Wait!  I think I'm detecting another theme here!

OK, I have to fess up. I just read an article in the Guardian about Emmet Gowin, whose body of work includes many portraits of his wife.

This camera seems to be working out.  I'll think I'll keep using it.


Tuesday, December 22, 2015

The Populist: Prototypes

As mentioned before, I got this bug in response to questions from pinhole workshop participants who inquired how to continue working with pinhole.  Acquiring the right materials and chemistry and a suitable darkroom space for tray developing paper always seemed to stop them in their tracks.  After looking at and experimenting a little with available plans already on the internet for homebuilt roll film cameras,  I set out to make a design for a camera that anyone could make with readily available materials that used commonly available film and processing, could be reloaded in the field and was reliably light-tight. My plan was also to produce detailed illustrated instructional materials on building and using the camera. (One of the things I did professionally).

I was kind of a fan of paper models of planetary spacecraft and tourist destinations. I based the Populist on the idea to print a pattern that could then be glued to card stock so individual parts didn't have to be precisely measured and drawn out by the user.  I experimented with versions printed on the heaviest card stock that would feed through my printer, but that's not something people commonly have laying around, and those turned out to be too flimsy.

The depth and ergo the distance from film to pinhole is 24mm, the diameter of the film cassette.  With two cassettes inside, the loaded camera is surprisingly sturdy and crush proof for something made out of paper. The 36mm wide image is the standard for 35mm film and therefore meets the objective of easily available processing.

I must have made thirty variations, often not completed when I discarded some idea or came up with an easier way to do things. There was a lively discussion about this while it was going on on the Lensless Camera: Making and Modifying forum on f295.

These are the two prototypes I saved.


They represent the two ends of the process.  The one on the left, made from a Sunbelt Granola box is one of the earliest; the one on the right, from a Frosted Mini-Wheats box, is one of the last. They both have the same shutter, except on the earlier it's attached with tape, and the older, I wanted to see if the glue was sufficient to hold it together during use.  You'll notice only one winder. I only made two or three winders and just kept reusing them on new variations.

The older camera, on the bottom, has neither tripod mount nor rewind hole.  I was going for ultimate simplicity, but later decided these two weren't all that complicated, but made regular use a much better experience, and both could be optional.

On the inside of the earlier, the internal dividers were separate pieces that were glued to the top, bottom and front with tabs. This was kind of complicated to cut from a pattern and tricky to glue reliably, straight and exactly were they needed to be.

Even though they consist of a double weight of cardstock laminated together with glue, they weren't very sturdy, and you can see how the one on the supply side is slightly bowed out as the film traveled over it, making that side of the frame curved.

In the last post about the PrePopulist, I said that was the last time I put felt over the surfaces the film rode over to protect from scratches and add some lightproofing insurance from the hole the winder went through, and I was a little surprised when I opened this camera and found I had done it again.  I later decided this was probably too complex, a unusual material to have, and was unnecessary.  When using the Populist without the felt I rarely have issues with scratches and the ones that do appear are usually from reusing a reloadable take-up cassette too often (I'm on my third cassette after 8 years using the same camera).

Another method that I eventually discarded was for the clicker which let the user count a certain number of audible clicks as the sprocket holes went past while advancing the film.  I started with the method Alspix used for the Matchbox camera.  It consists of a ring cut from a plastic comb-bound document (a common enough item for a mid-level university administrator, but another I didn't think would be common in the general population).  It was taped to the outside of the supply cassette aligned with the sprocket holes. This had several problems. It would make it a pain to reload in the field since you need tape on hand to do it. I had problems with it staying aligned with the sprocket holes.  It would click several frames, and then slide away from the sprocket holes and just ride silently over the film. In the matchbox camera, it was held in place between the tray and the cover, but in the Populist was just hanging out over the edge. This also pushed the film toward the pinhole creating kind of a wavy film plane.  Fun for some people I suppose, but I prefer a flat film plain.

I was planning to recommend people go into the dark in a closet to unload the film and rewind it into the original cassette if they didn't want to lose the last frame, but this clicker will slice off the sprockets as the film is rewound so I put this label on top with the viewfinding lines to remind them to remove it before rewinding.

It didn't to seem to meet my objectives for simplicity, field use and reliability, so I had to find another solution.


The newer version has the solutions to most of these problems.  The felt isn't there.  The interior dividers are made out of a pattern that folds into a rectangular shape that glues to the top and bottom, which makes one side automatically parallel to the other, and can be easily clamped with a binder clip while gluing.

It has the tripod mount. This one is a chunk of foam core to embed the nut in. I didn't think foam core was a common item, so in the directions I suggested people cut about seven or eight of these shapes and laminate them together with glue.

Just barely visible at the lower right of the exposure chamber you can see new clicker, a very small bit of beverage can aluminum taped to the divider right where the sprocket holes go over it sticking up just a millimeter over the divider.  This is probably the trickiest part of the whole job.  Too high and it just folds over and doesn't click and obviously too low or misaligned it won't click at all. However you can wind in either direction without damaging it or the film.

When I was making the shutter for an earlier prototype, I had this Logitech box laying around and I remember thinking it would be funny to use on this ultra low-tech device, and I reused the slider in this camera.

The pattern and directions are still there on my old web site, but sooner or later the university is going to shut that down, so here's a link to the file on Google drive. If you're really fascinated by this, here's a link to the original version with three addenda and pictures of four more prototypes.  Download and view in Acrobat reader to see the embedded notes.

I used these prototypes for about a year, and explored a lot of the themes I continue to play with.

The garden was a common theme in my black and white work. This was the first year Sarah started cultivating Habaneros. Edward Weston's pepper is one of the most famous photographs of all time, and for color photography, habaneros are a particularly rich variety.


I occasionally mention the inordinately prominent role serendipity plays in pinhole photography.  I didn't quite have a full frame left when I shot this rose, so it overlapped with the previous image and had to be cropped, which I avoid doing (except to correct for a non-level camera), but in this case it cropped the image for a dramatic composition.


One of the things I didn't do with my black and white cameras was use them anywhere I couldn't reload in the darkroom.  I did use a changing bag occasionally, but not very often.  One of the revelations of the first 35mm camera was how much I enjoyed just photographing anything I happened upon wherever I was.

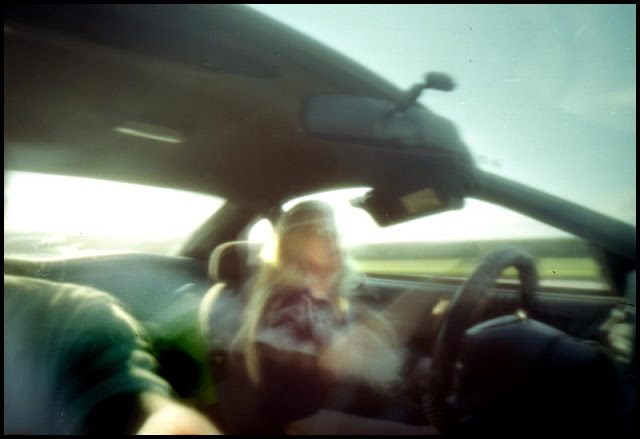
One day driving through the town where I went to graduate school, we stopped to visit a favorite oak we used to picnic under. There was no place to set a tabletop tripod, so I held the camera against my forehead for the half second exposure.


I started taking pictures in public places, although I must admit I'm often a little self-conscious when I do it, but rarely does anyone notice me. Most places don't allow regular floor tripods (or photography in general), and the places you can set a table top tripod in public buildings are few, but in this (stair)case, there was a convenient railing in the Charles Allis Museum in Milwaukee.


One day when we decided to go to Madison for the day, the only workable camera I could find was one I'd built while shooting the instructional photos.  I'd drilled the pinhole and attached it to the camera and I never inspected it with a loupe or measured it, but I guess it turned out OK. I was actually invited to add this picture of a foggy day on the roof of Monona Terrace on the Madison group on Flickr and it became a picture of the day selection.


I'd already carried my earlier 35mm cameras to Mosquito Hill and kept and still keep doing that. Close ups of leaves continues to be a theme I keep returning to.


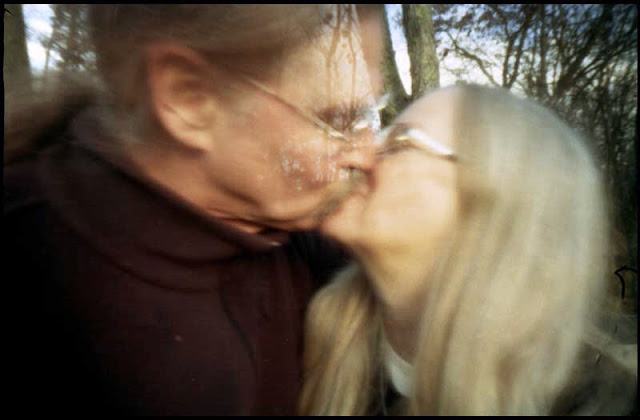
One of my dear loves is portraiture. I just can't bring myself to ask people to actually pose for me, but if they just happen to be sitting there...


One subject I do have control over (most of the time) and has no shame about being portrayed in odd situations is myself.  I've regularly done "selfies" since my twenties for this reason. Here serendipity rears its head again. Most pinhole cameras have no way to prevent opening the shutter without winding the film, and it's inevitable that a double exposure is going to happen sometime.  I usually hate when that happens, but sometimes something new results from it.


It looks like I didn't bother with a shutter on all these prototypes because here's another exposure on that roll of film with me holding a piece of tape with a tweezers while I time the exposure.


Sometimes things you thought impossible are achievable, as I noted at the time, with a sufficiently tired kitty in a sufficiently bright spot.  Here's Stewart at about three months old in the window in the hallway. I swear this cat can hear a tripod coming from the next room. This was with a pinhole that was non-circular with a little split on one edge I used just to see how that would affect the image.


The date of this is pretty specific since he was born in about March of 2007. By that time, I had to admit that I was hooked on the Populist and decided to build one specifically for my use.


Friday, December 11, 2015

Populist Precursers: The PrePopulist

The last camera I built before the Populist shares almost all the features that I eventually put into the Populist design.  This was before I had the idea to design a camera anyone could make.  I don't remember why I made this camera so soon after the Nickon. I made and started using it just before my experiments with the Matchbox Camera, and then returned to it for awhile after the summer kids' workshop until I started working on the Populist later in the summer and fall.


It's built on the same Populist plan of the front of the camera being a box with some internal dividers which hold the film and form the exposure chamber, and another box for the back of the camera which fits snugly over the front.

It's made from some pieces of acid-free solid black mat board which were left in the lab by one of our student graphic artists when she graduated. Unlike the Populist which is made out of thin cardboard from a flat folded pattern, these boxes were made from individual pieces that were glued and taped together.


It has a 24x50mm semi-panoramic format 24mm from the frame for an ultrawide 92 degree field of view. Eleven clicks per frame.


It had a very simple sliding shutter at one time, but I replaced it later and added new 3D finders.


I again covered the surfaces the film would ride over with felt, the last time I bothered with that.

The tripod mount is slightly different. I must have had trouble mounting the Nickon and knew those two layers of heavier card stock would be too much for many tripods. I just inset the nut in the bottom of the front. The tripod bolt then goes through a barely large enough hole in the bottom of the back, which holds it on.

With the first iterations of the Populist, the internal dividers were each separate pieces with flaps to attach to the bottom and top of the box. It was hard to get them attached squarely in exactly the right spot, they tended to get warped as the film dragged across them as it was advanced and they occasionally just came loose. While contemplating this problem, I just happened to look inside this camera when reloading it and discovered that I had solved it six months earlier by creating a single piece that folded into a rectangle which defined the image area.  It was easier to line up since once you aligned one side, the other side was automatically parallel the correct distance away, it had a larger surface for glueing, was easier to clamp, and was much more rigid.

This was the first camera where I made a second hole for rewinding. The film is contained inside a cassette in the film chambers and the exposed film should be sealed off by the dividers so you can get away with a hole in the supply and take-up chambers.  I put the hole in the bottom so when you rewound, you turned the winder the same direction as for winding and it just doesn't look right to have a hole in the top of the camera. A lot of camera makers put a separate winder for rewinding since you can't easily remove the primary winder, but I noticed a lot of Populists I saw people make used a second winder to fill that hole.  Being a bit OCD about light leaks,  I've always covered this hole with a thin piece of card stock inserted between the two boxes except for when I was actually rewinding.

I put a label on it with a handy exposure table. I didn't record the f ratio but I know I used a .15mm Gilder electron microscope aperture. The distance to the pinhole is 24mm which I chose because that's the diameter of a film cassette, and I've always liked wide angle lenses (although this is actually a little moderate for pinhole).  I returned to the 24x50mm format I had used in the Florida camera, again mainly because I thought 24x36mm was a little common, and I think I was intrigued by a lot of panoramic cameras I saw people using on-line.

I used this camera for most of the spring until I started experimenting with the Matchbox camera, and then returned to it after the summer workshop.

My son came home from college for Easter and after dinner treated us to a preview of his upcoming senior recital. This is a 10 minute exposure while he played a piece by Bach adapted for guitar.  He was particularly pleased to see how stationary his right arm was while he plucked the strings.


In the last post I said the Matchbox was the first camera I just carried around in my pocket but now I think I carried this one around for a few months first.

At that time the UW System sponsored a joint geek fest twice a year of about 10 system-wide groups that had something to do with technology. There was always a dinner on the evening of the first day, and this time I sat with a group of web developers.  While we were waiting, they all pulled out their digital cameras and cell phones (this was a year before the iPhone was introduced) and started taking pictures of each other... so I pulled out mine....  (I think the camera was supported sitting on a water glass.)


For that summer workshop for kids, while the Art Department Darkroom was undergoing asbestos abatement, I had to adapt a biology lab for a darkroom. The rooms in this building, which was built when 35mm slides and 16mm films were ubiquitous technologies, especially in the sciences, have metal blackout screens on all the windows. There were still enough gaps that I had to use about a whole roll of black duct tape to seal them for safelight conditions, but it made it really simple to put a "pinhole" in the window to create a camera obscura. A tripod screen from the AV department brought the image plane a little closer. This was pretty cool, because with a half inch hole, this made it about f250, the same as the 4x5 inch cameras the students had been using. Anyway, I documented this with the Prepopulist.


Another document from that workshop – the wet table in the foreground, with the dry table just behind it, with the print exposure boxes to the rear left, apparently taken at about half past twelve, just after class ended.


The garden was pretty spectacular that summer.


In the same group show in Minneapolis where I showed the pictures of Lake Griffin, I included this shot of a red and white lily.


Years later, when the Populist was in need of a some maintenance, I pulled this camera out again and took it to Mosquito Hill.


Notice the little trail sign on the left that's triply exposed, but nothing on the right side seems to be similarly repeated.  That was kind of a puzzle until I looked at the pinhole under magnification.


Gilder electron microscope apertures are drilled in a 3mm disk of very thin copper.  I mount them by punching a slightly smaller hole in a piece of tape, very, very carefully placing the disk on the sticky side over that hole and then sandwiching it in with another similarly punched piece of tape. This is quite tricky and the pinhole doesn't always end up exactly in the center of the punched hole. This one was apparently just barely aligned, and sometime in the intervening years had pulled away and left this tiny aperture which projected the extra images on one side of the image.

A year before, in 2010, I had used the camera for Worldwide Pinhole Photography Day and had noticed the double image, but thought it might be the result of bumping the camera.  I submitted this romantic picture of Sarah and I lounging in bed surfing the web,  she on the iPhone and I on the laptop.  Later that year Tony Lim of Pinhole HK organized an exhibit in Hong Kong that included a photograph by each of the Pinhole Day coordinators, and this is the image I submitted for that show.


By the end of the summer I was obsessively using various prototypes of the Populist, and eventually the one I've been carrying around for 9 years.


Monday, December 7, 2015

Populist Precursers: Alspix' Matchbox Camera

First off I want make sure to point out this isn't one of my designs.  You can find the original directions at matchboxpinhole.com. I can't find any reference to who Alspix is that relates to this site any more, but according to his Flickr profile he is Alan Cooper from Ipswich, England. The Flickr group dedicated to the Matchbox Camera has almost 1500 members and 7500 images.

One of the motivations for developing the Populist was that people who participated in workshops would always ask me to how to continue doing pinhole after the workshop.  After I had described the need for some kind of a darkroom with a bunch of chemicals, they would nod politely and back away slowly.

To address that issue, when I was preparing for a summer workshop I did for 4th through 7th graders in 2006,  I decided to have them make these matchbox cameras to take home on the last day, so I'd better try it out myself and see what it was like.  I had already made several 35mm film pinhole cameras, and as noted earlier in the blog was kind of smitten with the results.

The matchbox camera is pretty simple to make. Here's all the parts. There's a method for attaching a clicker so you can advance just the right amount, which I used in 2006, but didn't feel like messing with when I took this picture this morning. I also had a disassembled cassette to use for the take-up, but Alspix specifies a used cassette which still has a bit of film sticking out and taping the new film to that to pull it into the take-up cassette.


Alspix recommends using the pull top from an beverage can as a winder, and I believe he used a paper clip in earlier versions.  I used the wooden dowel from one of my previous 35mm cameras.

Heres what mine looks like assembled.


The shutter is simple tape and there's no tripod mount, but I think I superglued a nut to the bottom for a while and I wouldn't be surprised if I attached it to a tripod with rubber bands on occasion,

The pinhole is 12mm from a square 24mm frame. This makes it a pretty wide angle camera.  I noticed as I smooshed the tape to make sure it adhered and conformed to the junction of the box and cassette, it deformed inward, so I wouldn't be surprised if it was even a little more wide angle,

I started out with a .15mm Gilder electron microscope aperture that's almost exactly Mr. Pinhole's optimum recommendation.


Those apertures were part of a group buy Earl Johnson organized that included a whole range from .075mm to .8mm.  It takes a pretty short pinhole to film distance to qualify for the smallest of that range so since I had been cavalierly ignoring physics in selecting pinholes in the past, I switched it to a .1mm somewhere in the middle of the roll (the film is safely in a cassette so you can change the pinhole and only lose one frame) and continued to use that.

In the middle of this, my son graduated from college, so that's what I used that day.  This was before I even had a table top tripod and I sure didn't want to haul a regular tripod around at graduation. Here the camera was held against a tree for the exposure. (I also photographed his first master's degree commencement with a pinhole camera).


There's not always a tree where you need one. I photographed Sarah thumbing through the program by holding the camera against my forehead. Giving evidence to the extreme wide angle is my finger protruding in the left side of the frame.


As you might guess, the smaller than optimum pinhole works well in close-up situations so important in photojournalism.


This was the first camera I just carried around in my pocket and whipped out in odd situations. Here's a picture of my boss at the time in a meeting that took place in a regular classroom.


For a while this emerging hosta was my most popular image on Flickr.  It is a little hard to believe this came out of that tiny little camera, but I think the curving lines and soft pattern of the hosta leaves trick you into thinking it's sharper than it is.


These peonies are my favorite image that I made with the matchbox.


One thing I constantly hear about 35mm pinhole and sometimes about 35mm in general is that it doesn't hold up to enlargement. When I had a little exhibit at the university library, I had a largish frame laying around, so I made a 16 inch square print as a centerpiece for the show.

It has hung by Sarah's side of the bed since then.

I have great affection for this camera. However, it has several issues that keep me from considering it a reliable daily driver.

First of all, it's dependent on having and using opaque black tape every time you change film. Not the most convenient thing to reload in the field.

Despite being an experienced adult pinhole camera maker using 3M #235 for tape, I occasionally experienced light leaks, which were an equal risk every time you resealed the camera after loading.

Getting the tape off the thing to get it apart often leads to damage, but I guess it's so simple starting out with a new matchbox every time wouldn't be that much of a problem if you could figure out what to do with a half a million little wooden matches.

About the only idea I eventually used for the Populist was the clicker, and I struggled adapting his method for days before coming up with my own.

There's only one camera left before the Populist, which contains almost all the design features that eventually became the Populist.