Tuesday, December 25, 2018

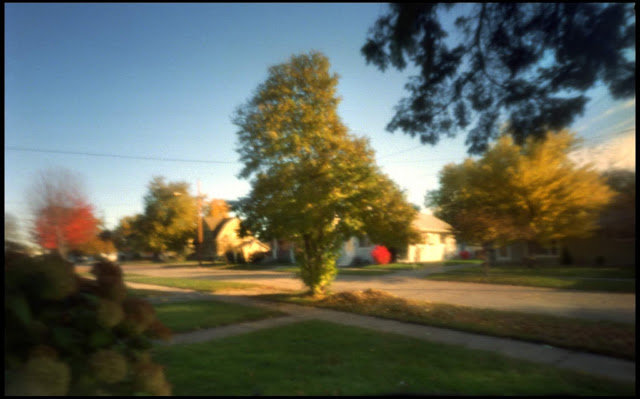
from f295: My first camera from a Scotch Box.

f295 was an international discussion forum begun and administered by Tom Persinger. Originally just about pinhole photography, it expanded into all kinds of alternative methods. It was active from 2004 until 2015 but it remains on-line. Recently it disappeared from the web for a few days, and that prompted me to decide to reprise some of my favorites here at Pinholica, for backup if no other reason. 

Bottles of Scotch come inside some pretty well made boxes. I've made cameras out of a Glenlivet box, a Glenmorangie box, and one I made for my son from Macallen as a Worldwide Pinhole Photography Day gift. (He and his best man toasted with a wee dram of Macallen before his wedding the previous autumn).  This is what started it all. Posted under the title "Last of the year," on January 3, 2006.


My wife gave me a bottle of Scotch for Christmas. She said she chose Glenmorangie because she thought the box it came in (3.5" x 12" cylinder) would make the best pinhole camera. How can you pass up a challenge like that? The only matte finished paper I had was already cut into 4" x 5" pieces so I taped three of them together. Two minute exposure (very gloomy day), .49mm pinhole, about f 128 (I took the pinhole off an old workshop camera) A bit of burning and dodging in photoshop to correct for center to edge exposure differential.


I got another Macallan box last night.  Happy Yuletide! Did you get a present in a box you could make a camera out of for Worldwide Pinhole Photography Day?

Friday, December 21, 2018

Pinhole distance role reversal with the Variable Cuboid.

With the first roll through the most recent iteration of the Variable Cuboid, I primarily used the 100mm front for exteriors and the 35mm for interiors.  To do due diligence, this time I switched and used the longer front inside and wide-angle out and about.

I started with a walk around the neighborhood. The Glad Tidings Tabernacle is just around the corner from my house. I've always liked the simplicity of the structure and the large plain windows. Looks like a little bit of curvy film on the right there.


The Centennial Inn assisted-living facility is nearby on Main St. Originally built in 1902 as the Ladies Benevolent Society Home, it looks shocked by my temerity.


I've recently heard a lot of discussion about how the surprise element of seeing what you've actually photographed was one of the delights of pinhole. The bit of curvy film in the church image and the pointy stretched-out corner of the Centennial Inn are some of those impossible-to-really-preview-in-your-head situations. Here's another with our big back yard hydrangea. The camera was actually touching the nearest branches and virtually the whole tree is in the picture. You can barely squeeze between it and the garage but here it looks like there's plenty of room. The garage looks smaller than the shrub. Your brain just won't let you see it like this even though it's kind of what's projected on your eyeballs and they're curved as well. But the pinhole reveals all.


The weather was exceptionally gloomy. Back inside with the 100mm mounted, I pointed the camera at Buddha's corner by natural light and left to go across town to the farmers market, do a little shopping and have lunch. After we got back, I forgot to close the shutter for another 20 minutes.


The gloom persisted. Here's a nice academic study of some silver by artificial light.


Moving on to the glassware. Amazing how still those pull chains on the lamp are. We had lunch a few feet away during the exposure. Check out the refraction of the base of the lamp through the clear decanter.


The sun came out for a while one morning.


I finally decided to defy the gloom, put the 35mm back on and just go out and wait as long as the exposures took.

I've had my eye on this building for some time. It was recently remodeled and houses the alarmingly named marketing agency DealerFire. There's a little walled garden behind the building for employees to hang out in, so I had a nice place to sit and wait 8 minutes for the exposure somewhat out of the wind.


I've been waiting all year to photograph this delicious grid of reflecting windows. The street in front of it and half of downtown was under construction all summer. You can see the plastic covering a ramp they poured just before they finished.


The nifty grid and the fresh concrete were the first thing that caught your eye, right? You may have noticed that I occasionally suffer from curved film. It happens because the film transport in my cameras can be a little tight and you have to loosen the supply a little bit and then take it up on the other side. This can push film out into the image chamber which you may have to retighten around the supply to pull back up against the image plane. I do like perfect grids and I do try to retighten the film but sometimes I forget. It was cold and windy. This is a disaster with a lensed camera but with pinhole it's just kind of funny. I'm afraid to admit that I'm beginning to like these random distortions. I've always avoided curved film planes because to me they stamp a standard look on the composition but this random stuff is kind of fun. I'm not sure what should be done about it. Maybe be more careless winding the film?

The 35mm front has .25mm pinholes. All except the tree were done with the rising pinhole.

The 100mm front has .35mm pinholes. All these were with the on-axis pinhole.

TMax 100 in Rodinal 1:50

Friday, December 7, 2018

Was Lord Rayleigh talking about sharpness?

June 2019. When my university retiree account disappeared with a new change in policy, the pictures I uploaded to this blog while logged into that account disappeared. I'm working on fixing that but it's going to be at least a summer long project. 

This all started because of a comment in the Lensless Podcast Facebook group that a longer distance to the pinhole always results in a reduction in sharpness.

What he means is, according to physics worked out by John William Strutt, 3rd Baron Rayleigh in the 19th century, the farther the pinhole is from the image plane, it will take a relatively larger pinhole in order to minimize diffraction. A bigger hole will result in a loss of sharpness. (Perfection of the pinhole is also a significant variable here. Think of it as a lot of tiny holes on the edge of the pinhole that the photons have to squeeze through.)

I've always preferred a smaller than optimum pinhole for my longer cameras.

Everybody checks Mr. Pinhole’s calculator for the optimal results of these equations, and everybody thinks of this in terms of focus.

That started me on a thought experiment.

These equations predict the formation of an Airy disk around a point of light.

.15mm electron microscope aperture, 24mm from the image plane, about 5m from the subject.


Even the best optics in focus form an Airy disk determined by some algebraic gymnastics on the wavelength of light. The Hubble Space Telescope forms an Airy disk. Billions are spent minimizing them. Even with adaptive optics it’s still there, it’s just very, very small for a perfect 30 meter telescope mirror.

This is different from circle of confusion which is associated with depth of field and focus. With a pinhole aperture, circle of confusion always gets greater with a bigger hole. Diffraction varies on both sides of “optimum.”

The Airy disk is still there out of focus, it’s just more diffuse. With a pinhole, it’s just always there, no focusing is going on. It will vary in brightness and radius as a certain size pinhole moves toward or away from the image plane or from a source, will be least bright at some point and the disk itself will vary in some predictable wavy pattern, always rather less bright than the point itself.

How does this really impact the image?

Think about your average American holiday image.  How many point sources of light are there when you have a decorated tree in the picture? An infinite number of course.  Every point in the image is a source. They all have an Airy disk. You just don’t notice them unless it’s a picture of a mini-light, which is also overexposed anyway, so its Airy disk is going to be a whopper. The Airy disk around each theoretical point of the soft glow of your kid’s dreamy face isn’t probably going to rise to the level of the film’s sensitivity, and if it does, it’s a soft glow, it’s not out of focus. Sharpness is determined by the size of the pinhole. At extremes, diffraction reduces the contrast between all the points and all the the disks to unmanageable levels, and it’s not going to be happy with overexposure.

That's assuming you could get the kid to sit still long enough for a pinhole portrait by the light of the Yule decorations with a smaller than optimum pinhole. Motion blur is something else again and like circle of confusion is determined by light acting like a particle which allows us to make pinhole images. Diffraction is evidence of it’s wavelike behavior that gives pinhole some of its unique quality and also affects all optics. Happy Holidays.


The pinhole holiday is April 28 in 2019.

Sunday, December 2, 2018

From f295: They're responding

f295 was an international discussion forum begun and administered by Tom Persinger. Originally just about pinhole photography, it expanded into all kinds of alternative methods. It was active from 2004 until 2015 but it remains on-line. Recently it disappeared from the web for a few days, and that prompted me to decide to reprise some of my favorites here at Pinholica, for backup if no other reason. 

I recently listened to the Lensless Podcast with Nicole Small speaking about her self portraits and it reminded me of this. Quoting Frank Zappa I had done a post of closeups of vegetables, and followed up a week later with this mostly wordless essay under the title "They're responding" on February 12, 2008.


I can feel it.


About a year later a local art collective organized The Oshkosh Triennial juried show where ten regional artists were featured with six works each and they picked me!  The last picture with the red pepper was one of the images in that exhibition.

These were all done with The Populist, .15mm pinhole 24mm from 24x36mm frame.

Wednesday, November 28, 2018

Pinhole Lab Camera Model 2X


The Pinhole Lab Camera was designed around a 2½ x 4 inch sheet of paper, one eighth of an 8 x 10 sheet, with the idea to keep the cost of using it to a level appropriate to shrinking school budgets. What if you didn’t care about cost and were willing to trade a little inconvenience for a big negative?

The Model 2X is exactly twice the dimensions of the original. I didn’t have to redesign anything. It's just the same PDF printed at 200% on a large format printer.

Although cost is no longer an issue, the pinhole lessons of recycling and use of common materials remain. It would take one heck of a cereal box to make this camera. If the template has been enlarged, the thickness of the material also has to be doubled if it was going to fit correctly. You need something a little stiffer for the larger sides of the camera to stay rigid.

Making Goldberry got me interested in the potential of corrugated cardboard. It’s ubiquitous in our e-shopping world, thicker than a cereal box and big boxes made out of it are common. The kids I used to work with gave me a carton from a 30 x 40 inch package of foam core, which was just enough.

Because there was so much surface to cover and the glue might start to dry before it got evenly spread, I used 3M Super 77 spray adhesive to attach the template to the cardboard. Otherwise it was just like building the original.

The dimensions have doubled so the negative is 5 x 8 inches, 4 times the area, exactly half a sheet of paper of course.

I stuck with .5mm pinholes made by completely piercing brass with a #10 darning needle because they're so easy to make. That size is mathematically optimal at about 5½ inches but with this large negative a smaller pinhole will give more benefit than it will lose from suboptimal diffraction.

With a 1½ inch reducer and a 4 inch extension, I have pinhole distances of 3½ inches (71 x 90 degrees at f178), 5 inches (53 x 70 degrees at f254), 8 inches (34 x 53 degrees at f406) and 12 inches (23 x 36 degrees at f610).

I have a few projects in mind that would benefit from the higher resolution of the large negative that would require going out and about away from the darkroom.

To use this camera in the field, a changing bag is necessary to reload and to add or remove the accessories. Loading a box this big in a changing bag is a challenge. When adding or removing the reducer or extension, I had to put it into the bag to unload the negative, take it back out to make the adjustment and then put it back in the bag to reload. After some practice ahead of time, it was manageable doing this sitting on a building entrance stairs. It takes about 10 minutes.

The camera, the reducer and extension, the changing bag and a box of paper wouldn’t fit in even my largest backpack and bike bag but it all went in my farmer’s market canvas bag. It’s all pretty light so it can hang over my handlebars if I ride carefully. It's not in the photo, but there was also a two-foot long piece of screen molding to use as a straight edge for viewfinding and of course, a roll of tape.


I printed it in January and built the thing in March. Being a little sick of the drab winter, I waited for more pleasant weather but got obsessed with a few other projects. Once it got hot I couldn’t imagine sitting outside in a long-sleeved black T-shirt with my arms in a changing bag. Eventually, on a Saturday in late October, I finally went over to the University on a morning with bright sunshine, which seemed necessary working at f610 with ISO 5 paper.

I managed to make an exposure at each of the pinhole distances.

After another month wavering on whether to mix a whole quart of paper developer, this weekend I ended up using Rodinal 1:50. There was a lot of uneven development in the highlights. In an interview with Marko Umicevic on the f/D blog, he described how he essentially does stand development with paper. I think I'm going to try it at 1:100, agitating a bit at the start and then letting them stand longer. Some experimenting around home, to get this right before setting off on the project I have in mind, sounds like a good idea.

All of these were done with the rising front pinhole.

Halsey Science center at eight inches.


Just north a bit, a tree at three and a half inches.


Oviatt House at five inches.


And ironically, really overexposed at 12 inches and f610, The Fredric March Theatre.


I was sitting on the steps of Swart Hall loading the paper for this shot with my arms past my elbows inside the extremely full changing bag. The tripod with a piece of old board on it was a few feet away. A couple looking like junior faculty parked where I was planning to point the camera, came by carrying a large desktop computer, said "hi" and went by me into the building. Just another day on campus.

It was hard to get the paper straight in the camera and these big floppy sheets of paper really get beat up taping and removing them from the camera in these confined quarters. I'm going to make some kind of cardboard frame to hold the paper in place and gently remove it.

But for now it's probably going to have to wait until it's warm enough to sit outside in a jacket light enough to get my arms in the changing bag.

Saturday, November 24, 2018

Variable Cuboid Mid-Mission Review


I’ve completed a second copy of the Variable Cuboid Pinhole Camera System and subjected it to testing. The system meets many of its objectives but some disclaimers are necessary where it misses expectations.

One defining feature of a camera system is that parts interchange between individual copies and I’m afraid, the hand-made Variable Cuboid can’t manage the tolerances to reliably achieve this interchangeability. The new camera back is about a millimeter larger than the original. The older fronts just won’t make it over the new back. With all my cameras, in order to make the joint between the front and back invulnerable to light sneaking through, I’ve always made the outer box by clamping it around the inner one when they are glued together. If the custom fit is tight enough to prevent light leaks in the camera it was originally made for, it just won’t go together if the new outside box is even slightly smaller than the original. Even with a flexible material like cardboard.

So you can make fronts of many different lengths for a specific back but your likelihood of making two backs the same size is basically random chance.

I made the second copy without comparing it to the first. I’m going to try to make another back measuring it against the last one, adjusting it at every step and see if it's possible to get them to fit interchangeably.

I make cameras to use myself but a goal has always been that the design was easy enough for anyone with minimal skills to make. I just made a 35mm Populist and it’s really easy. I may have crossed a line with the Variable Cuboid. It uses most of the same methods but to put it bluntly it’s harder to make. It has more parts, more layers, more specific clamping methods, numerous round holes to cut and numerous times where it’s necessary to wait until the glue is completely cured to continue.  I didn’t have any trouble with any of it but it might not be the best project to start with.

On the positive side, it meets the objective of being able to change the distance to the pinhole at any time without having to wait until the end of a roll of film. It does require a darkroom or changing bag to make the change. Making this change of length in the daylight would be difficult to accomplish with my cardboard, glue and scissors repertoire.

From my point of view, needing to go into the dark to change the length of the camera isn’t a big deal. I have a darkroom and changing bag. In actual practice I rarely shoot a complete roll in one outing and I kind of like the game of having a certain angle of view and hunting for scenes to take advantage of that length but it's also nice not having to finish the roll to play with something else. I did enjoy being able to use the wide angle for interiors and the long front for a walk around the neighborhood.

It was a pleasure to use. The finders were easy to see and line up. The film advanced smoothly. I glued wine corks around the wooden dowels to make an easier-to-grip winder. Like everything else with this camera, loading it requires a specific procedure, but once you learn it, it isn’t that hard.

I made two fronts for it, a 35mm with .25mm pinholes at f140 (optimal according to Mr. Pinhole) and a 100mm with .35mm pinholes at f286 (about 83% of optimum)

But the best part of building cameras is the user experience testing.

As soon as it was finished, with the 35mm mounted, I pointed it at an old standby, the south window in our kitchen using the on-axis pinhole.


The next morning, another trusty subject, the pothos above the bathtub, with the rising pinhole.


Later that afternoon, I changed to the 100mm and went out for a walk with the winter sun low in the western sky.


The bare giant oaks at the end of the soccer field casting their shadow onto the equipment sheds. After visiting Edward Gorey’s home on Cape Cod, I’ve been reading his anthologies. I think it’s starting to get to me. Rising front pinhole.


The white soccer goals spotlit by a sunbeam between the houses. On-axis pinhole


A tree, it’s shadow and another tree’s shadow against the Merrill Elementary Gym with the bicycle rack giving us a great big grin. Rising front pinhole 


There are two kindergarten rooms at Merrill School. On my inaugural ride with Goldberry, I depicted Andy’s sun-drenched kindergarten with storybook floor-to-ceiling, leaded-glass bay windows. This is the other kindergarten room. I think it might be from a different story. Rising front pinhole.


There was a waxing gibbous moon rising. I took this picture just to try to get it on film. It’s the fuzzy highlight just off the edges of the tree branches. Amazing to think the earth rotated enough to give it a little bit of a smear in the three minutes the shutter was open. Rising front pinhole.


I went around the building to try again and caught the last sunbeam illuminating the top of the middle school. It was pretty dim by now and the moon and the sky got overexposed while the negative gathered photons from the shadows. On-axis pinhole. (The camera is next to the elementary gym which is a little uphill from the middle school)


When I got back home, I put the 35mm front back on and made shepherd’s pie. I’m in front of the camera during almost the entirety of the half hour exposure.You can see lots of my utensils and ingredients, but I’m just a shadow on the cabinets. On-axis pinhole


The pie in the toaster oven. It only baked during a third of the 90 minute exposure. I was hoping there would be sort of a glow from the inside of the oven, but dinner would probably burn if it had been on during the whole exposure. On-axis pinhole


The next day, I had to go downtown early in the morning. I left the shorter front on the camera. This is the intersection of Church and Main. Rising front pinhole 


All summer I’ve been meaning to photograph the back of the Frontenac Flats, another work by ubiquitous Oshkosh architect William Waters. (The back of the building on the right in the previous photo is his also.) The front of the building on the corner of Brown and High Streets is a prime example of his neo-Romanesque style but this back view shows his attention to providing daylighting for the residents. Rising front pinhole.


All with Arista.edu 100 developed in Rodinal 1:50

It was a little discouraging when I discovered the parts wouldn't interchange between the new and the old Cuboids but I've recovered a bit after shooting a roll of film with it. It was also encouraging to see on Twitter that fellow midwesterner David Johnson had made one of my cameras. I don't hear that very often. I've already taken most of the pictures so I'll probably do a building-of post.

But you've been warned.

Monday, November 12, 2018

The evidence

In order to experience using a tripod, you have to shoot some film. Here's some of the data for my tripodology study.

Occasionally my bike rides take me on the Wiowash trail next to Highway 41 on the causeway over the Fox River and Lake Butte des Morte. In the center where it opens into a bridge, there are trails that lead down to the water's edge. I'd been down the one on the north side but until now had never gone down the one on the south. I discovered that it goes under the highway and over to the other side.

There was a boat full of fishermen just off shore sitting relatively still. I started with the PinRui flexible tripod wrapped around my bicycle handlebars.


Turning around, the view of the bridge itself.


Between 1980 and 2011, for state projects that are primarily for access by the public, there was a Wisconsin law which mandated that a small percentage of the construction budget be used to commission art work. Apparently they felt people accessing the bridge would be going by boat. Although the bridge has some decorative railings on top, I never knew these graphics were down here.


Walgreen's has decorative plantings around their parking lot. I had walked over so no handlbars to wrap the tripod around and nothing else handy. I had to put it down on the ground to capture this burning bush.


Another autumn show-off, again from about seven inches off the ground.


I switched to the ProMaster when I went out to rake leaves. Here I'm holding it against the trunk of our large pine.


Still held up against the pine tree but looking the other way up Central St. I thought I felt the camera slip around so I tried three exposures to hold it still. They all look about the same. This is the last one that I thought wasn't moving. The slight movement does give it a little extra pinholiness.


A view with the tripod on the ground, so no camera movement here.


An unsuccessful attempt at Footography.


I went on a bike ride with the Amazon. Can't wrap this one around my handlbars. Here it's held up against an oak tree.


Held up against a fence at the Yacht Club.


This happened to be on Halloween. It may look like the tripod is on the floor but it's held up against a column on the porch to get it just a little higher in order to look this guy right in the eye. The fluting provides some nice bracing to keep the hard plastic feet from sliding around.


This summer the arbor was covered with morning glory vines, although few morning glory blossoms. The first frost gave it a bit more of a Halloween appearance. The tripod is sitting on the gazing ball.


It is possible to hold the camera motionless held against a smooth wall but it takes some concentration.


I suppose if it were listed in a cooking supply catalog it would be called a counter top tripod.


It doesn't make any difference what the tripod is if you bump the subject during the exposure.


All with the Populist. .15mm pinhole 24mm from 24x36mm frame on Kodak Gold 200.