Wednesday, February 23, 2022

Serendipitious Studio

A lot of things inspired this post.

  • First and foremost was to try out semi-stand development with caffenol. I do it all the time with Rodinal 1:100 but in the upcoming classes at the Trout Museum, the students can mix the caffenol from its grocery store ingredients and we can pour it down the sink. I want to use stand development because it's the most forgiving of less than perfect exposure. It's not very pinholey to admit that it's for it's reputed high acutance as well.
  • Then there was some uncertainty surrounding the camera in which a roll of film had already been exposed. If I was going to learn anything, it was necessary to have a roll from a camera with an established record to go into the soup with it.
  • Doing a what-was-I-doing-at-this-time-last-year review, I noticed the studio exercise with the vegetables in the pre-vaccine cold of last winter. I had vaguely been thinking of repeating that except with stuff we've had for a long time.
  • A studio project has the appeal of being warm, out of the wind and right here.
  • After driving to the wilds north of Appleton to finally get our garage door ordered, we stopped at Kirkland's just to get out and snoop. As serendipity would have it, we found a solid black fluffy blanket for the couch to replace one that has "HO-HO-HO" emblazoned on it.
  • In the decorating transition that was occurring, the upstairs hallway window was unavailable. It was too cold to use the lanai.
  • Last year we got a love seat in the sunroom. It would provide just the right curve to use the new blanket as a backdrop for stuff that's around me all the time and, it's in a room full of windows with curtains that can modify the light using clothes pins on a hazy sunny day.
  • Lastly, just before beginning this, I watched about half a minute of a YouTube video where a guy said you could respark your creativity by looking for the beauty all around you. That sounds familiar. Well, everything reflects light.


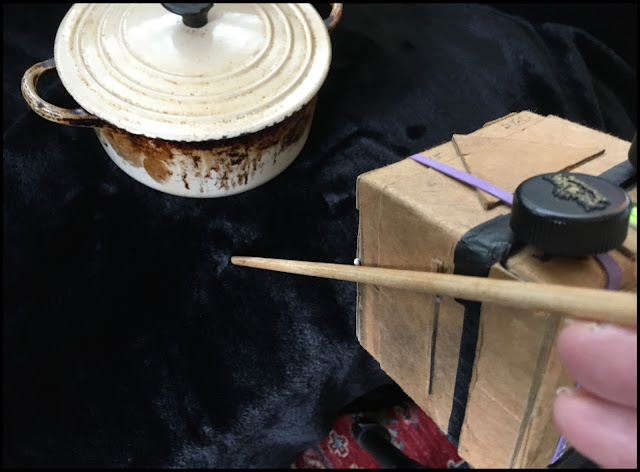
Another attraction of the studio method is that it allows the accurate composition of stick positioning. Held against the viewfinders, one of the dowels from the pasta drying rack is long enough to almost exactly determine the edge of the frame. It turned out these were a little generously composed  and most of them are cropped a little.


There was recently a meme on Facebook asking if you remember the tablespoon measure in the foreground. There were about a bazillion comments that they use one every day.  We're sure the lemon juicer came from Sarah's grandmother. The rest probably did too. We've always had them.


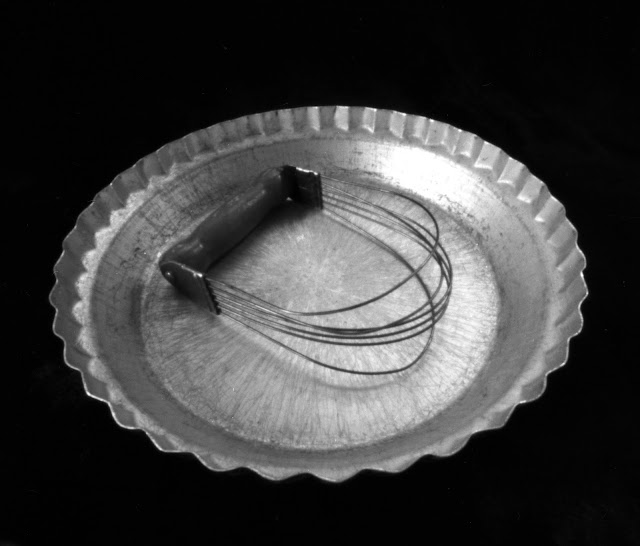
Sarah's grandmother's pastry cutter and my mother's pie tin. I use the cutter all the time but I'd made pies in pyrex for decades before the tin came into my possession, and I can't give up the glass. Odd statement from a pinhole photographer.


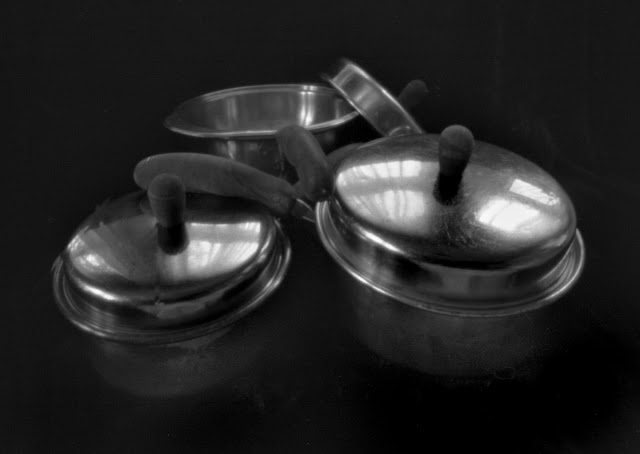
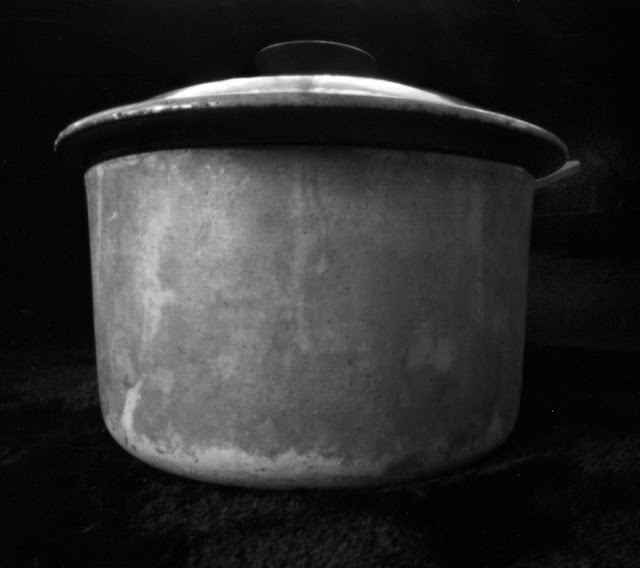
If it involves boiling or steaming, it's in one of these stainless pans. From Sarah's grandmother. Sarah's mother had a set exactly like this except it only had one lid and the lid handle was missing.


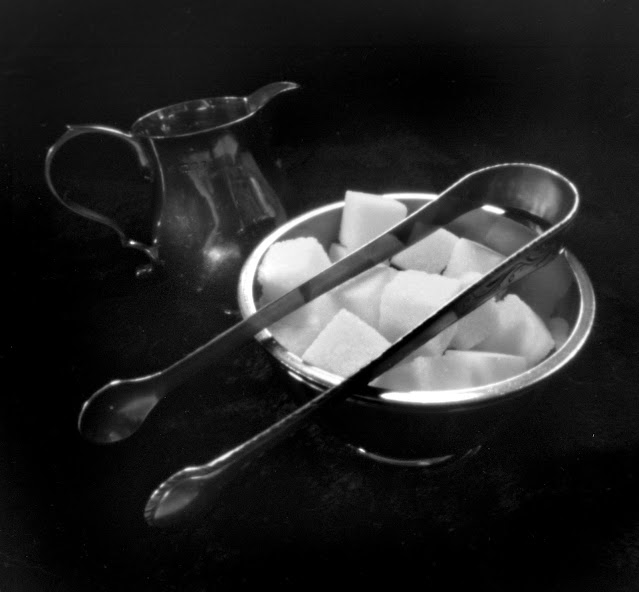
Other than a few fossils, the oldest thing we have is the sugar tongs made in London in 1776. These are all from Sarah's particularly victorious period on early eBay.


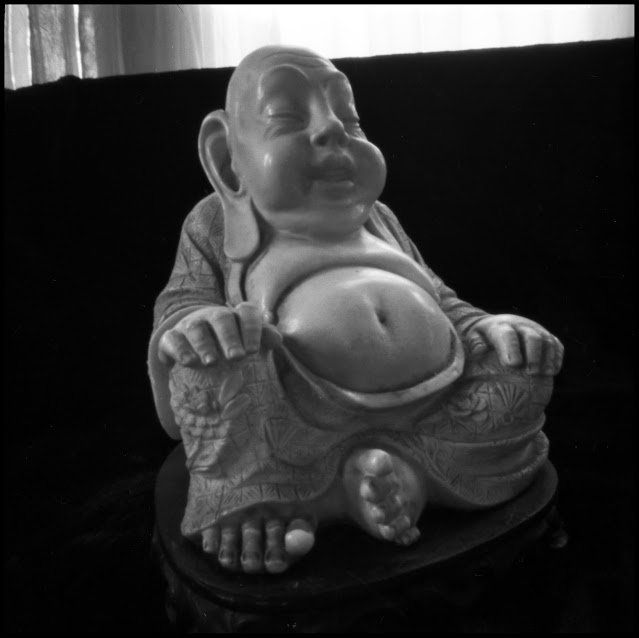
This Italian alabaster Buddha was in the window of the waterbed store we passed almost daily going from our apartment to the Joynt. Sarah gave it to me for my 24th birthday. Even with the precision of stick composition, it's easy to make a mistake and miss the edge of the backdrop, although it's really not that distracting in this case. It looks like enlightenment coming over the back of the couch.


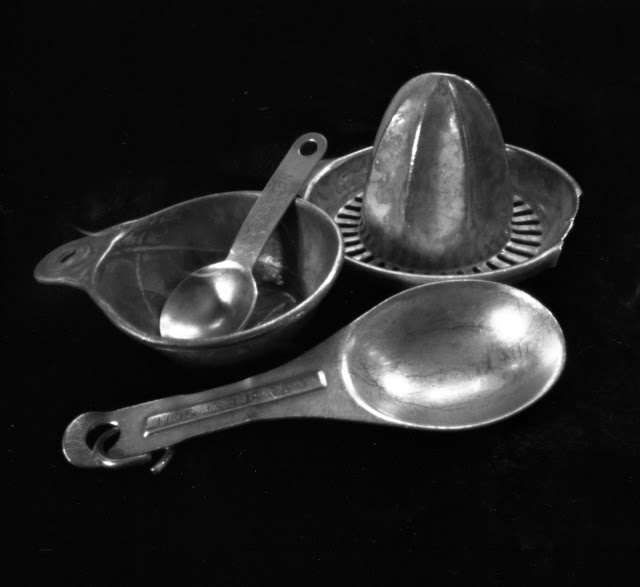
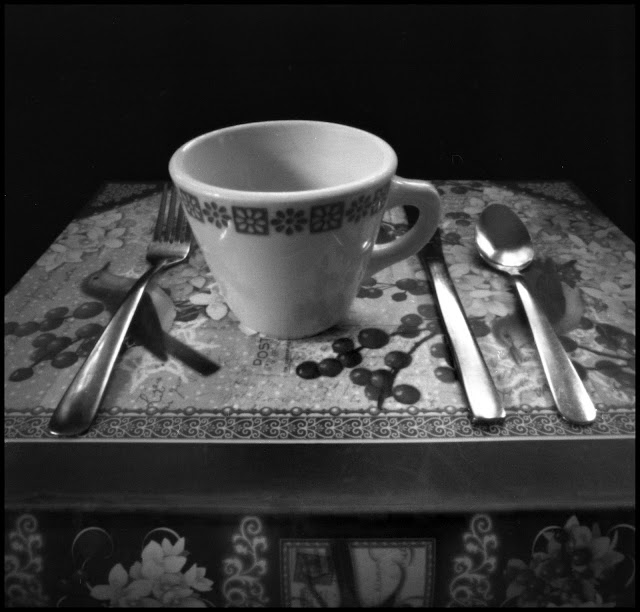
Tableware from the Blugold. I use the cup all the time to mix roux or salad dressing.


When we lived in Illinois, Sarah took advantage of a special sale in a mail brochure and ordered a set of Le Creuset cookware from the Spiegel catalog. The piece most commonly still in use is the small Dutch oven, but the larger version and a few other pieces still get used occasionally.


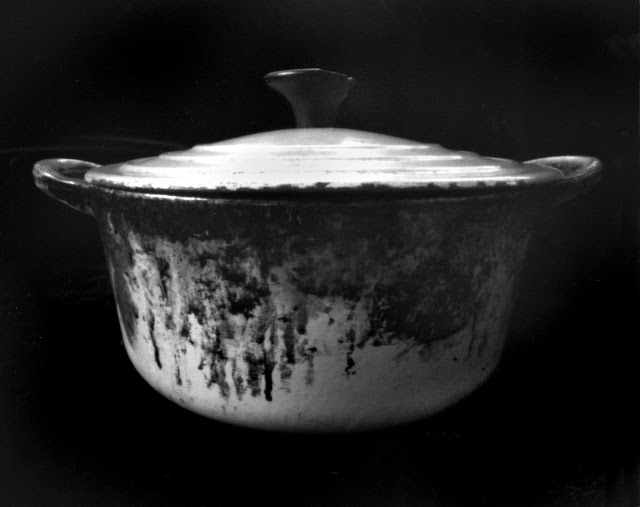
The pans from that set have wooden handles and we've had the handles burn completely off two of them. The smallest was replaced by this Calphalon pan which doesn't quite fit the Le Creuset lid, but it works if you're careful.


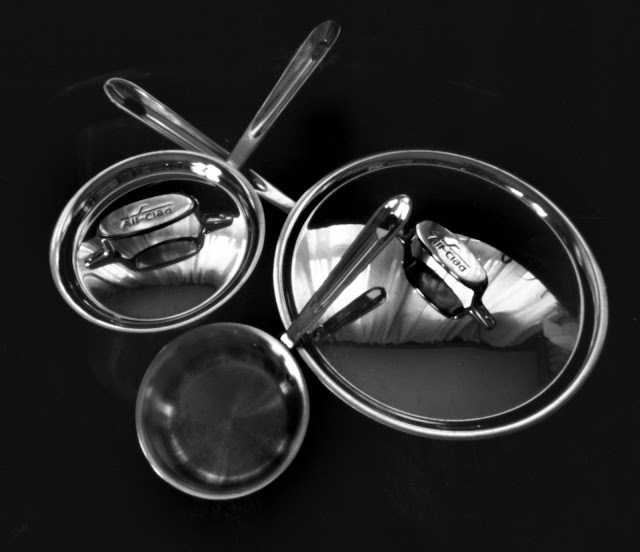
All reviews of Le Creuset cookware say it's really good to cook with but it's heavy and it hits the floor really hard when you inevitably drop it. We've been transitioning to All-Clad, all Yule gifts from Sarah. I'm embarassed how much I like the non-stick frying pan.


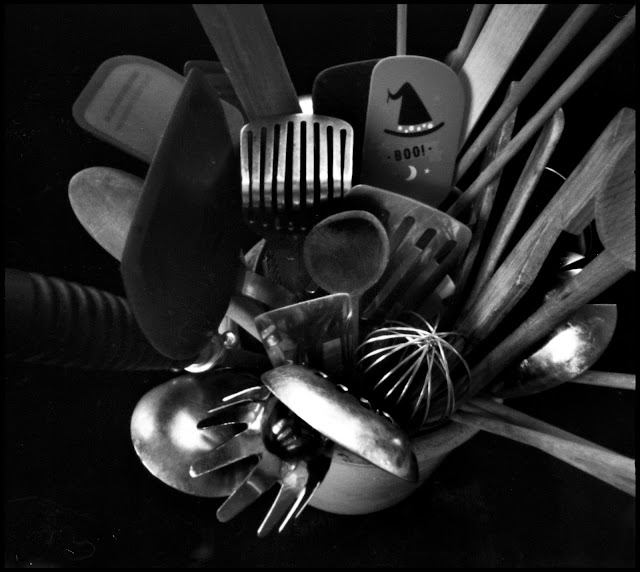
The utensils sit in a pickle crock next to the stove. They are of many vintages. The oldest is Sarah's grandmother’s potato masher which is the most effective I've ever used.


I've always cut holes for my cameras with an Xacto knife, but having others do it that way seems a little demanding and time consuming so I've become an aficionado of hollow point punches. In order to get the square one for the shutters, you have to get the hole kit (ha ha ha). It includes a variety of round punches I can also use. They're made for leatherwork. I can't hold them in place and hit them with a mallet without mashing my fingers a bit. This clamp makes a very effective handle.


It was necessary to go out in the field to the top of the piano for some documentary reportage. I caught Minnie and Mickey smoochin' behind the church!  They're lit by a small lamp held just above them to the left for three minutes, using the steeple to shade the background,


Looking at these very close up while retouching dust, it was one of those times I kept thinking: "So there's just this little hole in a cardboard box?"

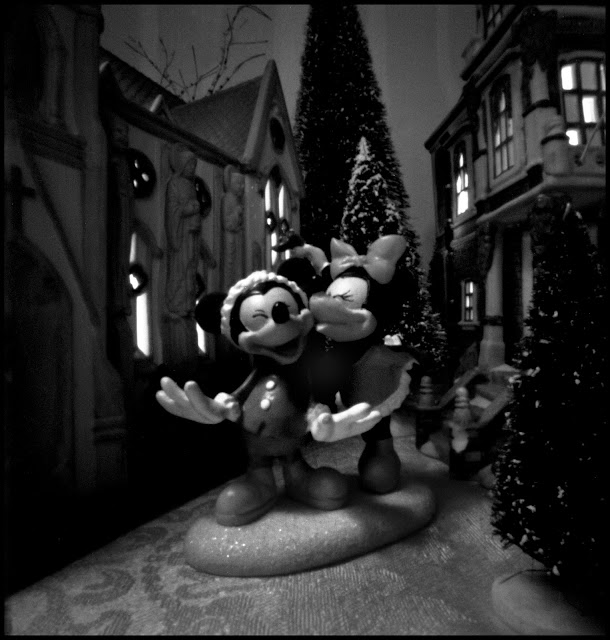
The 60mm front for the Variable Cuboid has a .3mm hand-drilled pinhole. The film is Ilford Delta 400 (interiors, ya' know) semi-stand developed in Caffenol, which worked fine.

Sunday, February 20, 2022

Absent-mindedness and the transmission of light

Another two-hour Populist, at 30mm again. The template had needed some minor adjustments (note the larger shutter) and I felt I still needed more camera-making experience. I chose some thicker-than-normal packaging from cat treats with holiday designs. At the time, I thought the cat on the Halloween theme was funny but with the shutter hole cut out of its back it looks a little distressed.


Concentrating so much on the process, I didn't notice that the cardstock was solid white until putting the template on the back – after completely finishing the front. Well, there will be at least two layers of cardstock and two layers of the template on every surface. Maybeee.....


I finished the camera, loaded it with Arista.edu 100 and put it in the sun so I could tell how bad the light was leaking on an unexposed frame.

While waiting for this test on the first frame, I thought that I could make an informal assessment by shining the light on my iPhone through the material. Here it is compared to the brown cardboard of the Hershey Bar Camera from last week.


That's pretty bad. It barely diffuses the light. But the finished camera will have two layers of template everywhere. If the camera is kept in dim light with the slow film, especially the reciprocity failure-prone Arista, the leakage might be under the film's response level. 


That first frame demonstrated the camera was not remotely light-proof and fogged all the film that had unwrapped off the spool, obscuring half of my first dim light experiment. These first few exposures were hours long but did keep the leakage to a minimum. The second exposure fell victim to what I presume was a cat-tripod collision.


All of these are cropped to one extent or the other. The dim light strategy worked for the most part but the tops of the frame (the bottom of the image) showed streaks in almost all of them. The last dried rose from a bouquet several weeks old.


A selection of small tomatoes segregated by color so you can more efficiently compose your salads.


The exposures were taking forever. By happenstance, the next day was in the 40°s F and heavily overcast. If the camera stayed in the pocket of my black coat and just came out for the pictures, it might be OK.

The trail along Miller's Bay has several low spots that fill with water and reflect the trees.


From nearer shore, looking across to Ames Point on the left and Monkey Island on the right.


More puddles reflecting pines this time.


The parking lot next to the boat launch ramps was completely filled with a giant tent which was in the process of being erected.


At one point the side sagged far enough down so with the tripod extended on it's tiptoes, the camera could get a view of the full extent of the roof.


As I finished that exposure,  a young man came out from under the canvas and we had one of those "Can I help you?" conversations. I told him how cool the curves and textures of his tent were. He said: "You noticed?" The tent was for the Battle on Bago ice-fishing contest and the Polar Plunge. It was walled in with hay bales to stay warm. This fearsome looking machine, which I assume tightens cables, was lying on the ground. I'm surprised a human has enough mass to keep from getting spun around by it,


Looking southeast over Lake Winnebago, at the shanty town about quarter mile off shore, which is just barely at the resolution the pinhole can render.


The pinhole is .20mm. Optimal at 30mm is .23mm.

This is something I have to practice a lot. I started with two sheets of paper under the brass and couldn't get anything smaller than .27mm.  I tried with one sheet of paper. The first two tries were very small and ragged. I made them into nice, smooth but too-large holes trying to enlarge them and then came up with this very good looking .20mm and mounted it on the camera.

The film is semi-stand developed in Caffenol.

Friday, February 4, 2022

Rapid Camera Prototyping and Testing


One of the objectives in all the camera building lately is to convince myself that an 11-17 year old population can build one of these in two, three-hour sessions and leave enough time to learn how to use it and practice a little. It's important to be able to spend the third session taking pictures so we can develop them, take an 8x10 group portrait on paper while they're drying, and learn how to capture negatives on the fourth day. On the last day: capture, edit, choose, print and maybe display them in the lobby so the other classes can see them when they come and go.

I've already made some accomodations like making the tripod mounts and the winders myself beforehand. There were two other variations to reduce time to completion. 

A piece of card stock slid under the rubber bands would make an adequate counter shutter and take seconds to make. I found it really no trouble to use.


The other simplification was to just draw lines for view finders. It takes a little more concentration than with a 3D object to make sure you're looking straight down the line, but it works. I'm ordering some metallic markers so they're as visible as possible. I swear I hadn't noticed the numbers indicating how many of each candy bar came in these boxes when I chose them for this 6cm camera with 6x6cm image.


Using a pinhole I had already made, the camera was ready and loaded with film in two hours. If the students take twice as long as me, it will be just adequate. After clumsily cutting off one of the stops on the shutter, I decided to redesign the shutter to make it easier to cut out and have a larger glue surface to adhere. The double-weight shutters and the shutter channel would have be made in advance by me. That might also eliminate the need for Xacto knives. I've discovered weeding tweezers are more effective for removing the release layers from the templates and adhesive - and safer.

The day after I made the camera was the only day above freezing we were going to get for a while. I stepped out on the porch to assess the situation and decide where to ride to take pictures. I noticed the sun was shining in my own back yard. It took just under an hour to make these exposures. Times varied from 15 seconds to 3 minutes. By the time an exposure ended, I knew what my next picture was.

I've taken a lot of pictures in the garden and worry a little about being repetitive but as Bill Talbot noted in The Pencil of Nature (I'm paraphrasing): If it's a different angle and the light is different, then it's a different photograph.

The gargoyle with his tilted crown always looks a little rakish but this morning he looked a little jauntier than usual


On the shelf above him the sun shines through a decorative lamp.


Light raking along the side of the stone bird house.


Backlit ivy with a particularly good rendition of the screen.


Some ivy from the other side. In the upper left corner the interference pattern between the screen and its shadow on the birdhouse is really cool.


Elwood looking very metal with a crest on his head, which is a serendipitous merger with the table behind him.


A little left of the arbor. I intended to center it. I was using my new travel tripod. It's portability and flexibility are great but it has four things that have to be tightened to keep it from rotating and I inadvertantly moved it when I opened the shutter. Just having the lines for viewfinders worked well otherwise.


I've been taking a lot of pictures of corners lately.


Garden artifacts in the back corner of the yard.


Fencing which provided a stable base to photograph my new hedge trimmers this summer.


The corner of the lanai.


Since his resurrection this spring, I've had at least five disastrous exposures of Elwood. I finally got a picture of him in The Sculpture Garden post in October. Probably pressing my luck with a second view of him on this roll.


This camera has a .28mm pinhole, approx. f200. Arista.edu 100 semi-stand developed in Rodinal 1:100