

- My recent post about The Pinhole of Nature got me a little nostalgic about making photographs with 4x5 paper negatives.
- I didn’t want to have to carry several different cameras with me in order to use different angles of view, and I was happy with how the new Pinhole Lab Camera solved that.
- 4x5 is a very popular format so others might be interested in this camera if it were available in that format.
- I recently discovered that when I did a workshop for teachers in 2016, I had cut quite a few more sheets of paper down to 4x5 than they actually used and I still had about 100 left in my darkroom. Just yesterday I discovered that about 500 sheets of 4x5 paper from my grant project in 1992 were still good. Developed for three minutes they showed some fogging but after only 90 seconds (the recommended time) they looked completely clear. So I have lots of material for experimenting.
Of course it’s a little bigger than the original Pinhole Lab Camera. It takes a piece of cardboard 14 inches square to make the big boxes. The only packaging I could find that big were three-packs of Old Dutch Ripple Potato Chips. (Crisps to everyone outside of the U.S.) I had been saving one for awhile but I needed two, so I made the sacrifice and bought another box. We’ll find something to do with the chips. The new one was their special holiday packaging so to celebrate the season I put the printing on the outside. It’s also a nod to Pinhole Day colleague Tom Miller who has almost exclusively used Jay’s Potato Chip cans for cameras for years.

It is a little tight in the changing bag but not too bad after a little practice.
As with the smaller version there are slots to put the image plane at four distances:
- 1.5 inches (38mm) for a 106 x 118 degree angle of view,
- 3 inches (76mm) for a 67 x 79 degree angle of view
- 4.5 inches (114mm) for a 47 x 58 degree angle of view, and
- 6 inches (152mm) for a 36 x 45 degree angle of view.
I think most people consider 6 inches (150mm) “normal” for the 4x5 format.

There’s also a slot at the front to slide in a pinhole mount. I made two sets: .33mm and .55mm. I was trying for .3mm but .33mm was the first matched set I came up with. The hole made by fully piercing the metal with a #10 quilting needle is .55mm, which is extraordinarily easy to do.
At 6 inches with the .55mm pinhole, a lion in front of the public library.

Some frosty leaves in the back yard, again at 6 inches with the .55mm pinhole.

The optimal pinhole size for this distances is .52mm, so .33mm is really small but the distance to the subject is also a variable in those equations. I tried the small pinholes about 6 inches from this spider plant, and the smaller size does seem to work for closeups. We’re now at f462 so there’s a cost in exposure time to this added sharpness.

The calculated optimum for 4.5 inches is .45mm. This is with the .33mm pinhole. An arrangement of three buildings whose fronts have classical elements.

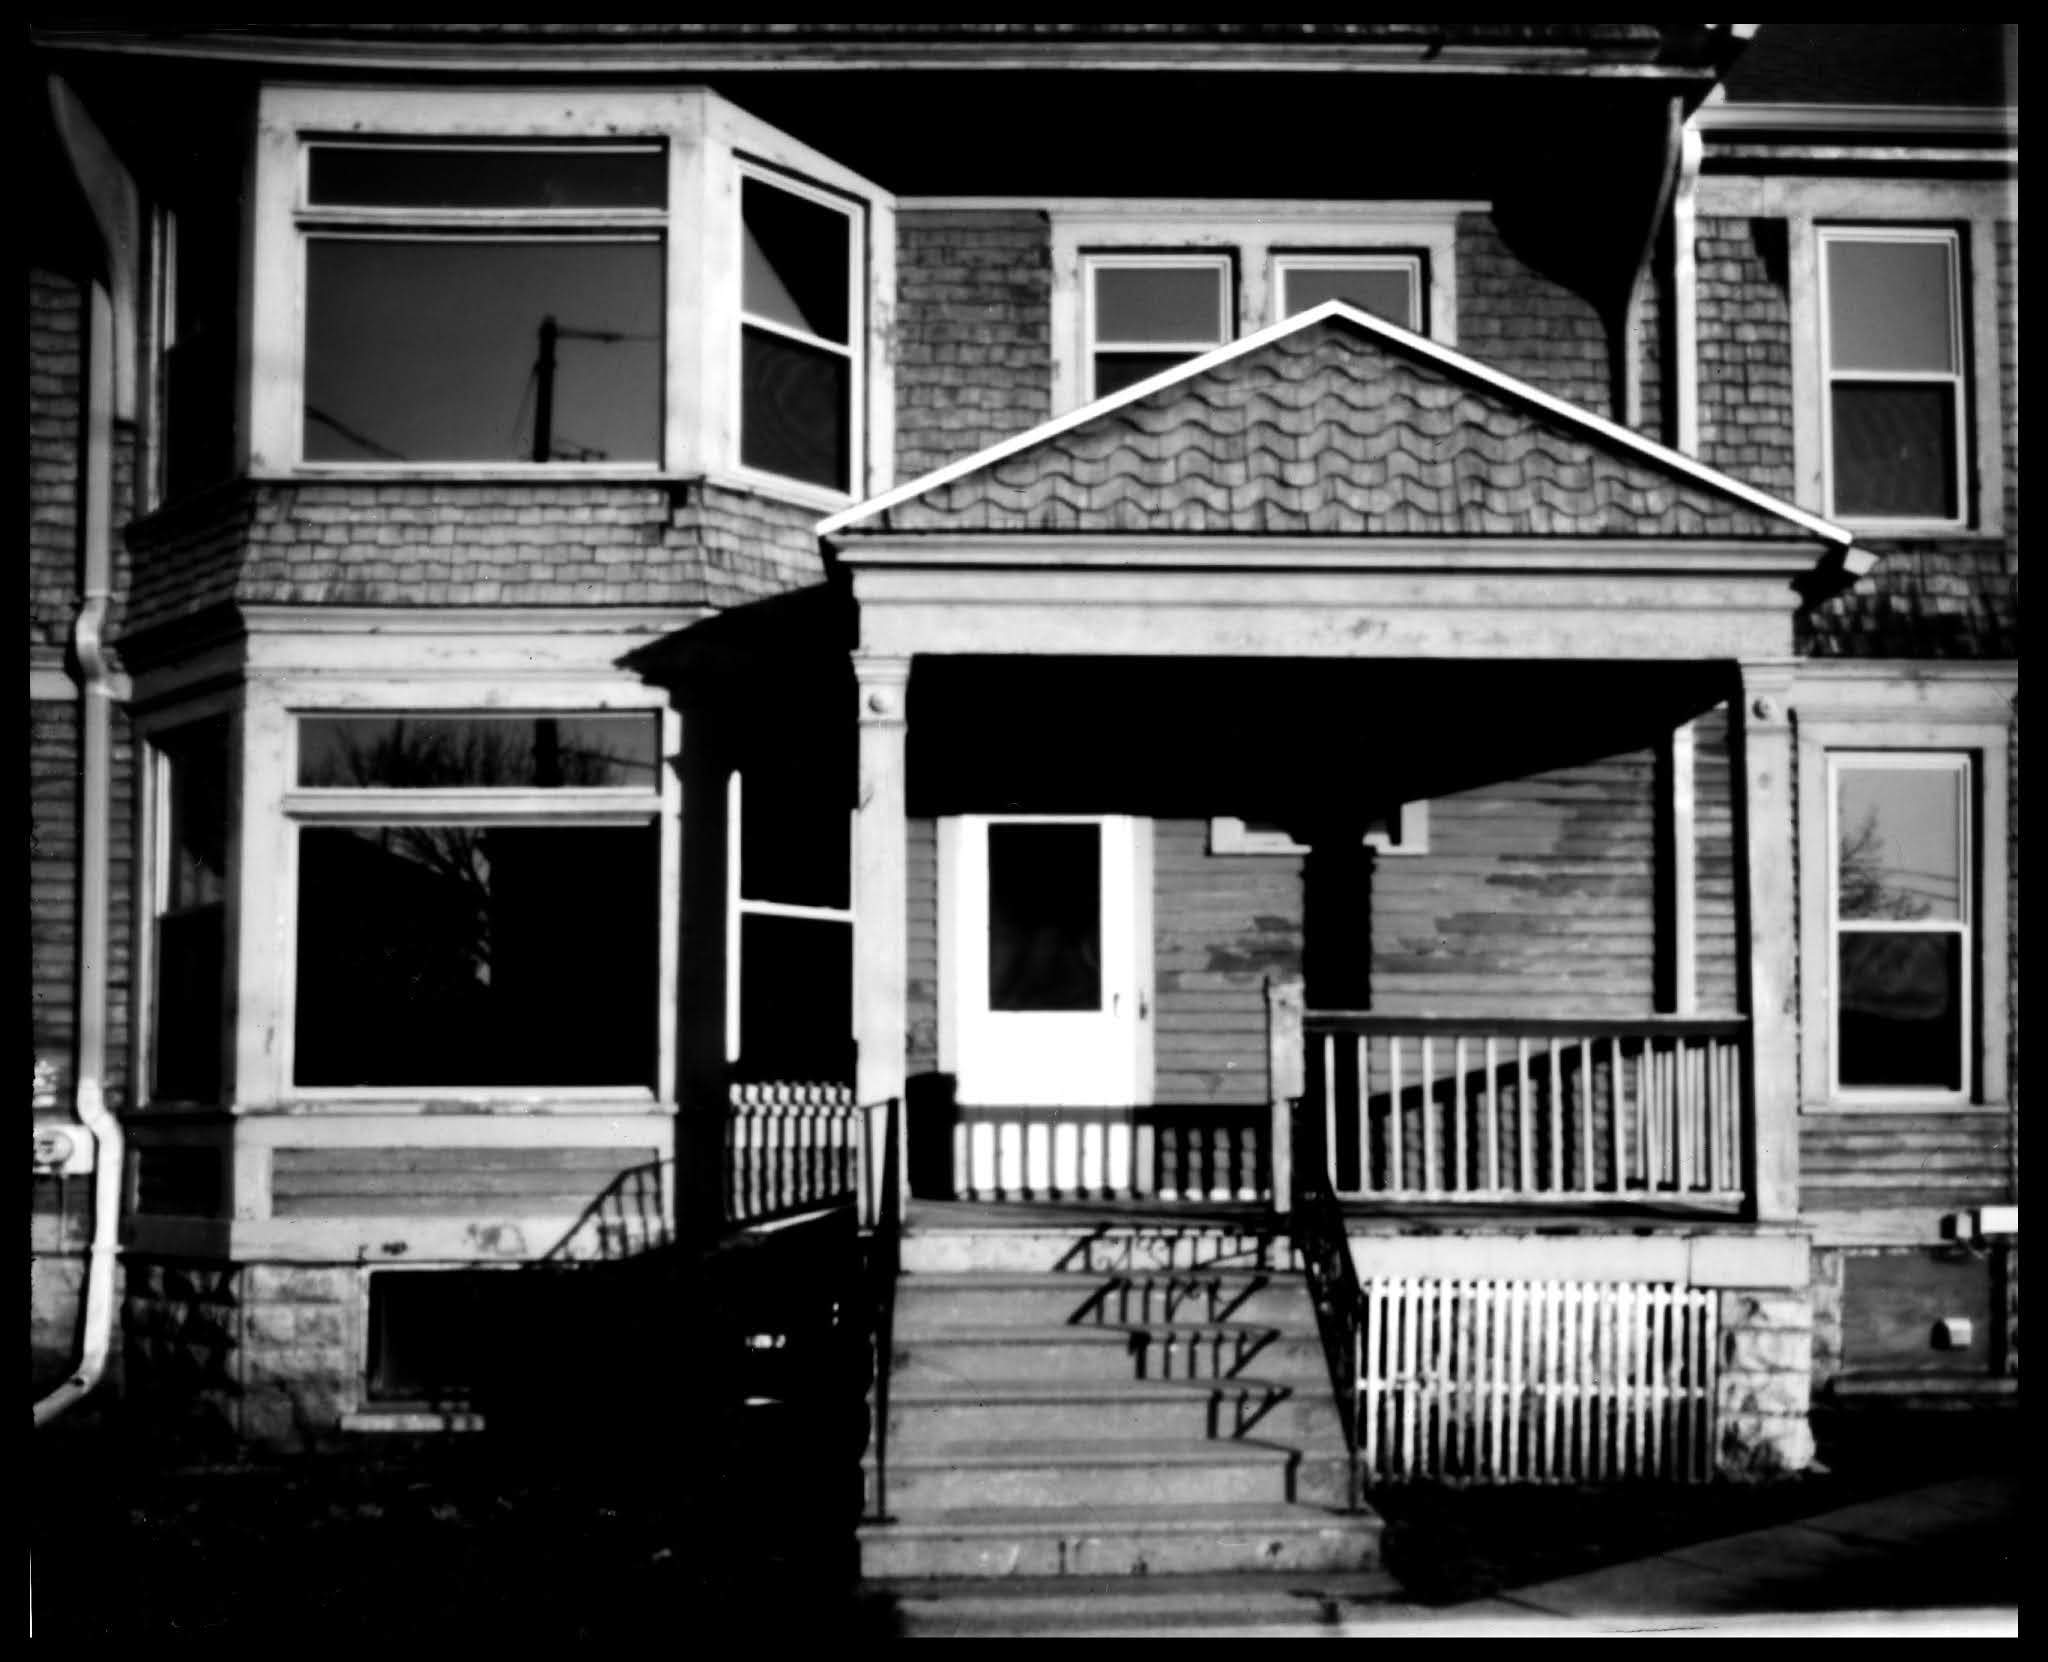
At 3 inches, the equations say .36mm is optimal. This is with the .33mm pinhole. The old Post Office on Washington Avenue. These windows are the local office of our conspiracy-minded Senator, Ron Johnson. His staff probably thought I was surveilling them with a mind ray.

My neighbor’s garage at 3 inches with the .55mm pinhole. I’m always surprised how little difference it makes using these suboptimal pinholes. The lesson I get is that with these large negatives, you could use whichever size pinhole would give you the most convenient exposure times for your conditions.

At 1.25 inches, once again I had trouble with the shutter getting in the way. This one was with the .33mm pinhole.


So explain this to me. For the stairs of the Library, despite a little fogging in the upper left corner, the whole frame is exposed.

I’m not too concerned about this shutter problem. I know these extreme wide angles are very popular but to me it’s kind of a novelty effect. It turns out that when I put the rubber bands on to clamp it down, they pulled the shutter out of alignment (I’ve warned you about this). I had to quickly try to slide it back into it’s proper position before the glue dried. It looks like I got it a couple millimeters to the right of where I wanted it. I may try to pry it off and make another attempt to see if I can get the whole frame in at the shortest distance.

All the pinhole images were done on Arista.edu Grade 2 semi-matte paper developed in Arista paper developer.
I like these images, well done!
ReplyDelete