
One of the things I enjoy about the Populist design is that it’s fairly easy to modify to different formats. I’ve extended it to longer distance to the pinhole, used wider formats, and made stereo cameras. Since I did the redesign last year, I hadn’t made a stereo version from the new template.
The 6x6cm format is particularly appropriate to stereo. Side by side chambers make the baseline between pinholes almost exactly the distance between human eyes. Most manufactured 35mm amateur stereo cameras like Kodak’s Realist had this separation, but made pairs on every third frame.

Poking around on the internet it looks to me like the most common angle of view (aka focal length for the refraction enthusiasts) for stereo cameras is the “normal” one of about 40 degrees which supposedly reproduces the perception of depth of human vision. In experiments I’ve done, angle of view is less important than the distance to the subject and the baseline. There have been couple pinhole cameras available for sale and, as is pretty common in pinhole, the angle of view is typically a little wider. I’ve done quite a bit of 6x6 pinhole at 60mm, so I decided I would see how it worked out at 45mm, about a 67 degree angle of view, which is very wide for stereo, but actually a little long in the pinhole world unless you make a camera yourself.
In order to make a Stereo Populist, take two templates for the camera length you want, and cut off the end for the film chambers on opposite sides.

Then glue them together on to the cardstock to make the camera body. This will eventually have to be done for the back as well. Here's the two parts of the back template glued together.

Glue the two internal assemblies together.

Otherwise it’s just like making a regular Populist. It does require two shutters. I have used two separate shutters and connected them with a bar in previous stereo cameras. Since I was thinking of taking pictures of buildings, I wanted a rising pinhole, so I modified the shutter I made for the stereo fronts for the 6x9 Variable Cuboid for this camera’s longer baseline.

Since the divider between the two chambers is now in the middle, I decided to put the tripod mount external to the box in couple layers of foam core glued to the bottom. The counter shutter can remain in the same place and either one can be used, but you have to remember to advance two frames for every picture.
I did encounter a few problems and they may be related.
I painted the inside of the box and sides of the boxes where they slide together with some black satin finish interior latex paint. That may seem like a smooth surface, but when two of them are in contact, they don’t slide well at all. I think it also may have absorbed in to the card and made things swell a little. After the paint dryed, when I put the two boxes back together, it was almost impossible to get them apart. I eventually sanded off the paint on those surfaces.
If the take up reel isn’t parallel to the supply reel, eventually it will skew in one direction and completely jam up the film advance. I’m not sure if I hadn’t gotten it glued right or if the latex paint distorted it, but the take-up chamber was a little wider on the bottom. The film locked up before I even got to the first frame. I made a little spacer and taped it to the bottom of the divider and that did the trick. The film advanced very smoothly thereafter.

I loaded and unloaded this roll of film three times and in addition to crumpled backing paper at the beginning, let’s just say it didn’t do it any good.
These are set up for Crosseyed viewing. It’s easy to learn with this simple exercise.
I also broke down and bought Anaglyph Workshop in case you have red/cyan glasses. I hope I got the alignment correct. Unlike crosseyed viewing where your brain and focus muscles do all the work, anaglyph does need alignment. It’s a hand made camera. OK? Every .16mm error from on-axis pinhole placement equals a degree on the image. The pinhole itself is only .3mm. The best thing I found is to adjust it until the image looks most monochrome. Viewed with your red/cyan glasses on, out of alignment they have an overall reddish or cyanish cast, like something you might correct with color balance. It gets sharper when it’s aligned too.
I thought the hydrangea would be a good subject. I always forget how wide angle 45mm is on 6x6cm format and kept finding myself having to move closer to things to fill the frame. The nearest branches are about 4 feet (1.3m) and the garage is about 12 ft. (3m). Looking at the left side of the garage, I can see a definite separation from the distant trees.


Out in the street the near tree is maybe 30 ft. (10m) away and the much taller trees across the road are twice that. I can see the separation, but it’s not really dramatic. Stereo imaging is based on parallax, and a 166:1 (10m/6cm) triangle doesn’t look that much different than a 330:1 triangle. Everybody knows that wide angle cameras make things look farther away so you have to consider that in what your brain is trying to figure out.


The “Then and Now” exhibit at the Public Museum was part of the reason I’m doing this. A lot of pictures in the museum archive are stereoviews and the curator told me they had put stereoviewers and cards out in a previous exhibit and the public really liked looking at them.
One was of the Oshkosh Normal School which burned in 1896 and was replaced by Dempsey Hall. I expected to take this from the sidewalk but I had to trudge through the snow halfway to the building in order to get it to fill my frame. Stereo imaging is as much art as it is science. One of the tricks is to put something in the foreground so you get a real 3D wow effect. I thought the trees would take this function. It’s a better trick if your foreground object overlaps your background object. If you look at the top of the entrance where it’s right next to the tree branches you sort of get that 3D wow effect. The pine trees are even closer to the camera, but since they don’t also overlap the building, you hardly notice.


The Dale School was our first home in Oshkosh. Again, I thought the trees and the low wall would give that dramatic depth, but again I was too far away. This was as close as I could get and keep the camera level and have the top of the building in the frame even with the rising front. Shoulda just gotten closer, pointed the camera up and lived with the converging verticals.


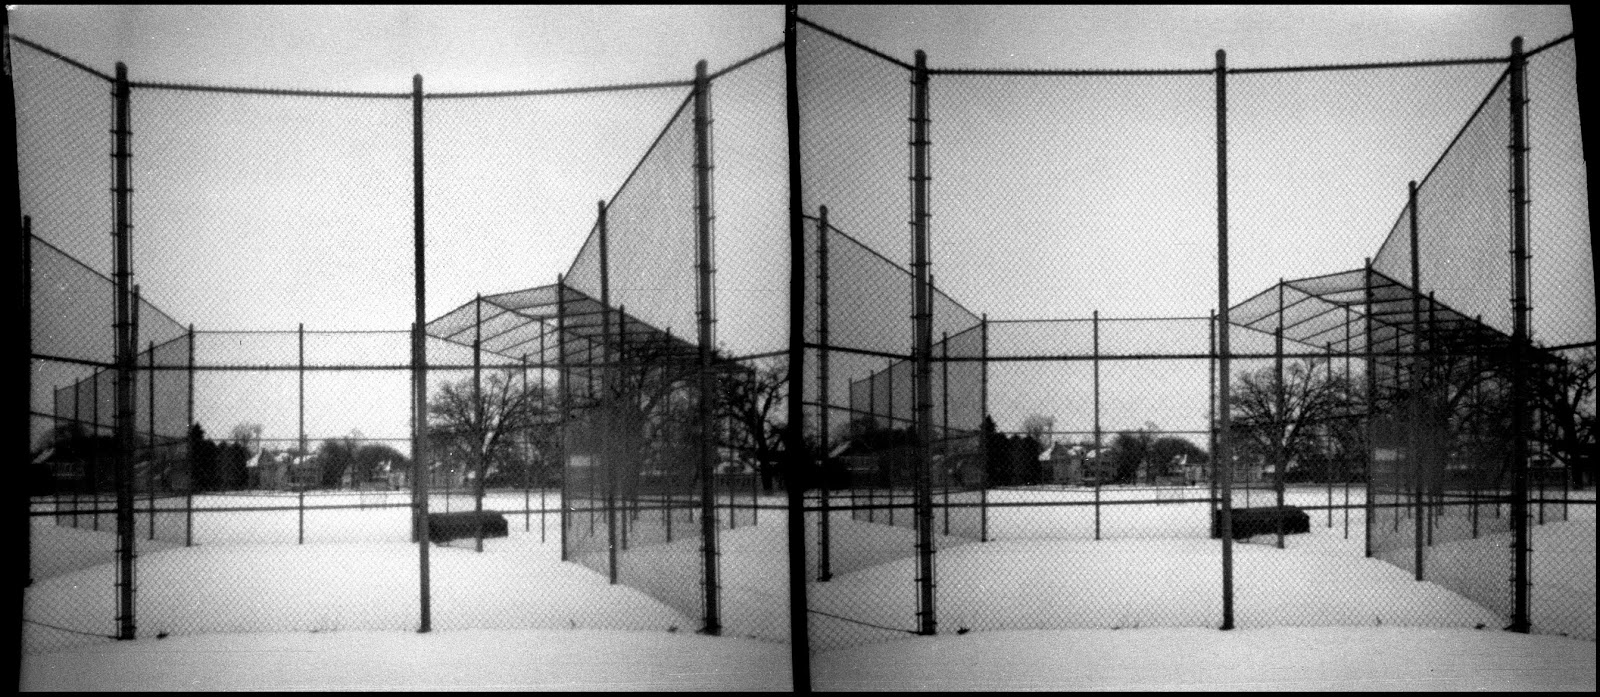
Probably the best of the lot, incorporating all these tricks are the chain link backstops in East Hall Field. Unfortunately, there’s no stereoview match for it in the museum archive.

For this camera and for those similarly wide angle pinhole cameras on the internet, I’ll paraphrase Robert Capa: “If your stereo effect isn’t good enough, you’re not close enough.”
Thanks Nick, I was just thinking about contacting you about your stereo camera, and here it is. My question is really about dimensions of the finished camera. Left to right top to bottom. I'm worthless to figure those details and building, so I will have a friend help with the building part. Can I send him a link to this site? Tthanks Ni k Ric Johnson
ReplyDeleteThis comment has been removed by the author.
ReplyDeleteRik,
ReplyDeleteSorry about missing this comment from a couple weeks ago. The 120 Stereo Populist is 7.325ninches wide, by 2 inches deep by 3.75 inches high (including the tripod mount and winders. Of course you can share anything on my blog and let your friend know I'll gladly respond to any questions.