

I have several objectives for using packaging cardboard for making cameras in my upcoming workshops. Promoting recycling and reuse of materials is the most obvious. A second is identification. If all the cameras look alike, they tend to get confused. Is that your camera or mine? While the front and back from two different cameras may fit enough to go together, being just slightly off is likely to cause gaps and light leaks. Another is personalization. If you could make the camera out of packaging from something that has meaning to you, that may give an extra boost to your use of it.
One last attribute is the decorative nature of such packaging. I used to think I didn't care about what my cameras looked like, but at least half of them have the packaging visible and often with graphics matching on different parts. I think having the end product be a decorative object might make the industrial arts aspects of the camera build more appealing to some people.
To that end I wanted to see if I could use a box with nice, but not-big-enough designs on the sides which had ugly branding or other text in the middle. Could I cut cardboard and put the nice looking parts back together with painter's tape and the template?
On the front, this camera has a seam vertically, which is completely covered by the shutter. The back has a seam horizontally, but there's also the second layer of lightproofing, two layers of template and the backing paper of the film to hold back any light sneaking through the seam.
It was really pretty easy to work with the seamed pieces and once it was together they were almost unnoticable. There doesn't seem to be any evidence of a light leak on the film (It was a sunny day). If there had been, you could get away with some opaque tape over the seam on the inside.
I also colored the winders and the shutters with the metallic purple pen I got for the viewfinders, used blue beads for the side viewfinders and purple asparagus rubber bands.
Also, in my quest to achieve camera making enlightenment, I wanted to make another camera to try out my new 5/16 inch hole punch.

A long time ago I searched for 3/8 inch paper punches, which is the size of the winder dowels. Everything I found could only extend into the material less than half an inch. It would barely work for the winder holes on the back of the camera, so it didn't seem worth it. Instead, I bought a hollow point punch and a rubber mallet which can make holes wherever necessary. First was a 3/8 inch punch and it was too large to tightly seal around the dowel. I then got a 5/16 inch punch which makes the just-too-small hole I needed.
When faced with the possibility of teenagers perhaps having to wait in line to use the punch, I once again searched for paper punches but this time with the magical difference of the 5/16 inch measurement. One that came up was their largest size so it hadn't appeared in my previous search. Ta-Da. A regular paper punch that will make a hole a whole two inches into your piece, big enough for a 60mm camera. It works on all but the central holes in the camera bodies and the taking shutters. It can be used for the counting shutter. OK, it could work for the taking shutter too, but having the taking shutter and the counting shutter the same is just wrong.
Using a few parts I will make in advance this summer, I have been making a camera in two hours. With this one I spent the time figuring how to match the prints, made the tripod mount, and customized and cut a double shutter on the new template, which I got wrong at first and had to fix. It took me four hours,
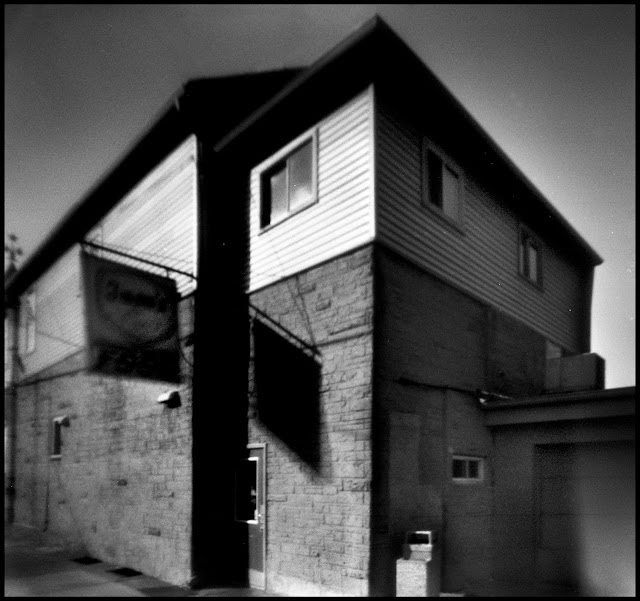
I put a .26mm pinhole on the axis and a .29mm on the rising pinhole and called it f160. When calculating that f ratio with Mr. Pinhole, it said the Sunny Day Exposure was 1 second. It was a sunny day so I guessed at all these exposures.
I've been participating with a Facebook group The Fox Valley Photography Meetup Club of Northeast Wisconsin. They just started meeting up again and I was considering going in March. They have a challenge topic for each meeting to which everyone submits a picture. This month the theme is "Ice." I began with this bare patch next to the boat launch docks in Menomonie Park but seem to have succeeded in making it look like someone dumped a bucket of sand on the snow.


Images and camera both well done as usual, Nick!
ReplyDeleteNice work!
ReplyDelete