Friday, August 5, 2016

Road Trip: Alderley, Wisconsin and the West Bend Jailhouse.

Sarah's family lived on their farm in Pierce County since 1867.  Her great grand parents immigrated from Norway, but we knew they had spent some time in southern Wisconsin somewhere around Watertown.  Recently Sarah uncovered a handwritten note her grandmother had written for her for an assignment in grade school about her ancestors experiences.  It contained the line "Shortly after they were married they left Alderley, Wis. in a covered wagon pulled by oxen, which took them about 30 days."

A few minutes on Google Maps, and sure enough, Alderley still exists in eastern Dodge County. Curiousity overwhelmed us and we had to go take a look.

Alderley turns out to be like a lot of unincorporated villages in Wisconsin, about eight houses and a bar, who's main feature is a small dam on the Ashippun River, with a golf course next to it.


Just east of Alderley is Norwegian Road.  Probably has something to do with Rasmus Hanson spending some time here.  Here Sarah photographs a house that looked like it might have been around at the time they left for Pierce County.


Norwegian Road crosses an unnamed intermittent tributary of the Ashippun River.


On the other side of the road, several cows watched Sarah take pictures.


West Bend is only about 20 miles away, but most of the route we took goes through several small towns with stop lights and it took us about an hour to get there.  We were planning to visit the Washington County Historical Society's museum in the old courthouse, but it was pretty late and we just had time to go on the tour of the old jailhouse next door. It included not only the lock-up, but the front of the building was also the residence of the Sheriff and his family. Must have been an event for them when miscreants were brought in through the front door, the only entrance to the building.


I tried taking pictures inside, but we had to follow the tour which included a family with some really curious children, and I only could get about 30 second exposures, which only yielded this rather dark image of one of the cells, which I guess is kind of appropriate for the subject.


All with the Populist.  .15mm pinhole, 24mm from 24x36mm frame.

Sunday, July 31, 2016

Under the heat dome

Well, the northern end of it anyway. I don't think the temperatures can compete with most of the country, but anytime you have a dew point in the upper 70's, it seems like a little oven-like.

It's always a little surprising that someone with such a great deal of fluff isn't uncomfortable in these conditions, but I guess it's the same insulating quality that leads him to sit around out here in the Wisconsin winter.


This whole series began when I noticed these really tiny flowers in the diverse ecosystem that is my lawn. I wondered what it would look like if I got as close as possible.

I'm surprised at how few close-ups I see on pinhole forums despite the ease of doing it. One of the facets of the digital photography revolution that's often overlooked is how easy close-ups have become.  With most digital cameras, you can almost set the lens on an object and still get it in focus. It hasn't been that long since everybody had to use film cameras, and I'm not sure how aware people are that it use to be fairly complicated to get a closeup at much less than two feet, even with a professional SLR.  Either you had to have a specifically micro lens, which even then only got down to 1:2, or a set of extension tubes or a bellows. Exposure had to compensated to account for the additional distance of the lens from the film. Full aperture built-in light meters still had to be stopped down in order to get an accurate reading.  With pinhole, no focusing is going on, so you can put the camera as close as you want.  There is the issue of diffraction, and you probably can get a better closeup with a smaller pinhole before Lord Raleigh's equations blur your photograph. but you don't otherwise have to make adjustments for getting as close as you can.

Anyway, the camera was about a half inch from these flowers, so its at a magnification of about 2:1. Kind of tricky to keep the camera from shading the subject, and I blew a couple frames when I opened the shutter and it cast a shadow on the scene.


I then noticed that these were only the buds of these flowers. Even this close to the ground with a short exposure, the wind got in my way.  When you're this close up, it doesn't take much movement to blur things.  It's also a little tricky to accurately pre-visualize what you're doing, and I missed the blade of grass in the foreground.


Another humble little flower that's very profuse on the lawn is the clover.  Even moving out to two or so inches away, there was a enough trembling from the wind to prevent a really sharp image.  But does that really matter? Occasionally on the f295 forum there would be a post about how to achieve maximum sharpness with a pinhole, and inevitably the discussion would end up with numerous exhortations to not get too hung up about sharpness – the pinhole aesthetic was about something else.


The pictorialist movement, begun by the Linked Ring in England, argued that emphasis on technical achievements, one of which was sharpness, was limiting photography's acceptance as a medium of art, and that more emphasis should be put on subject, composition and lighting.

A prime objective of composition is to direct the viewer to a center of interest. One of the tools you have with a lens to accomplish this is reduced depth of field by using a large aperture, but this isn't available to the pinholer, so you have to use composition, light and albedo to ensure that center of interest pops out from the background.  This weigela blossoms rather profusely fairly early sometime in May, but this one flower was still left in late July. The color contrast definitely contributes to it's prominence in the picture, but what really pops it out is that it's sitting out in the sunshine against the shaded foliage.


Sometimes albedo is sufficient to highlight the center of interest.  In this case I had a little trouble keeping these white monardas from blocking up, and I did a good bit of burning them in. I admit to spending quite a bit of time burning and dodging and otherwise manipulating contrast to get my pictures looking the way I want. Sometimes I encounter the argument that anything but a straight scan is somehow inauthentic. Ansel Adams is often idolized as the ultimate photographer and he unabashedly promoted how he manipulated negatives.  Moonrise over Hernandez, New Mexico is famous for how unrecognizable a straight print is from the final exhibited print. I don't see any difference in doing it with digital software.  (Although Edward Weston used to brag that most of his images were unmanipulated prints)

Lighting isn't the only tool for giving the illusion of depth. Scale can be another tool.  The two blossoms flanking this double decker in the center provide a cue to the depth in this picture.  I also like the way the cluster creates this triangular shape in the center of the composition and the way it's framed by the areas of somewhat lighter green foliage on either side of it contrasted against the darker corners.


My posts about flowers get by far fewer hits than others.  I suppose that's because it's perceived as being trite. I guess I've often told budding photographers that they should just express themselves and make photographs they like and the audience will decide what is important art or not. I think Imogen Cunningham and Robert Mapplethorpe pulled off getting artistic recognition using flowers as subject matter, and I'll just let you decide about these.


All with the Populist. .15mm pinhole 24mm from 24x36mm frame.

Friday, July 22, 2016

Midsummer garden

Another day with just enough of a lack of wind to tempt me into the garden.

Always impressed by some of the volunteers that come up in the driveway.


A red volunteer among the purple petunias


Some calabrachoa sneaking out among some sweet potatoes.


A lily sneaking though some invasive tree.


It doesn't take much breeze to make flowers tremble, but in this case it was a big bumblebee that landed just after I opened the shutter and stomped around for the whole exposure.


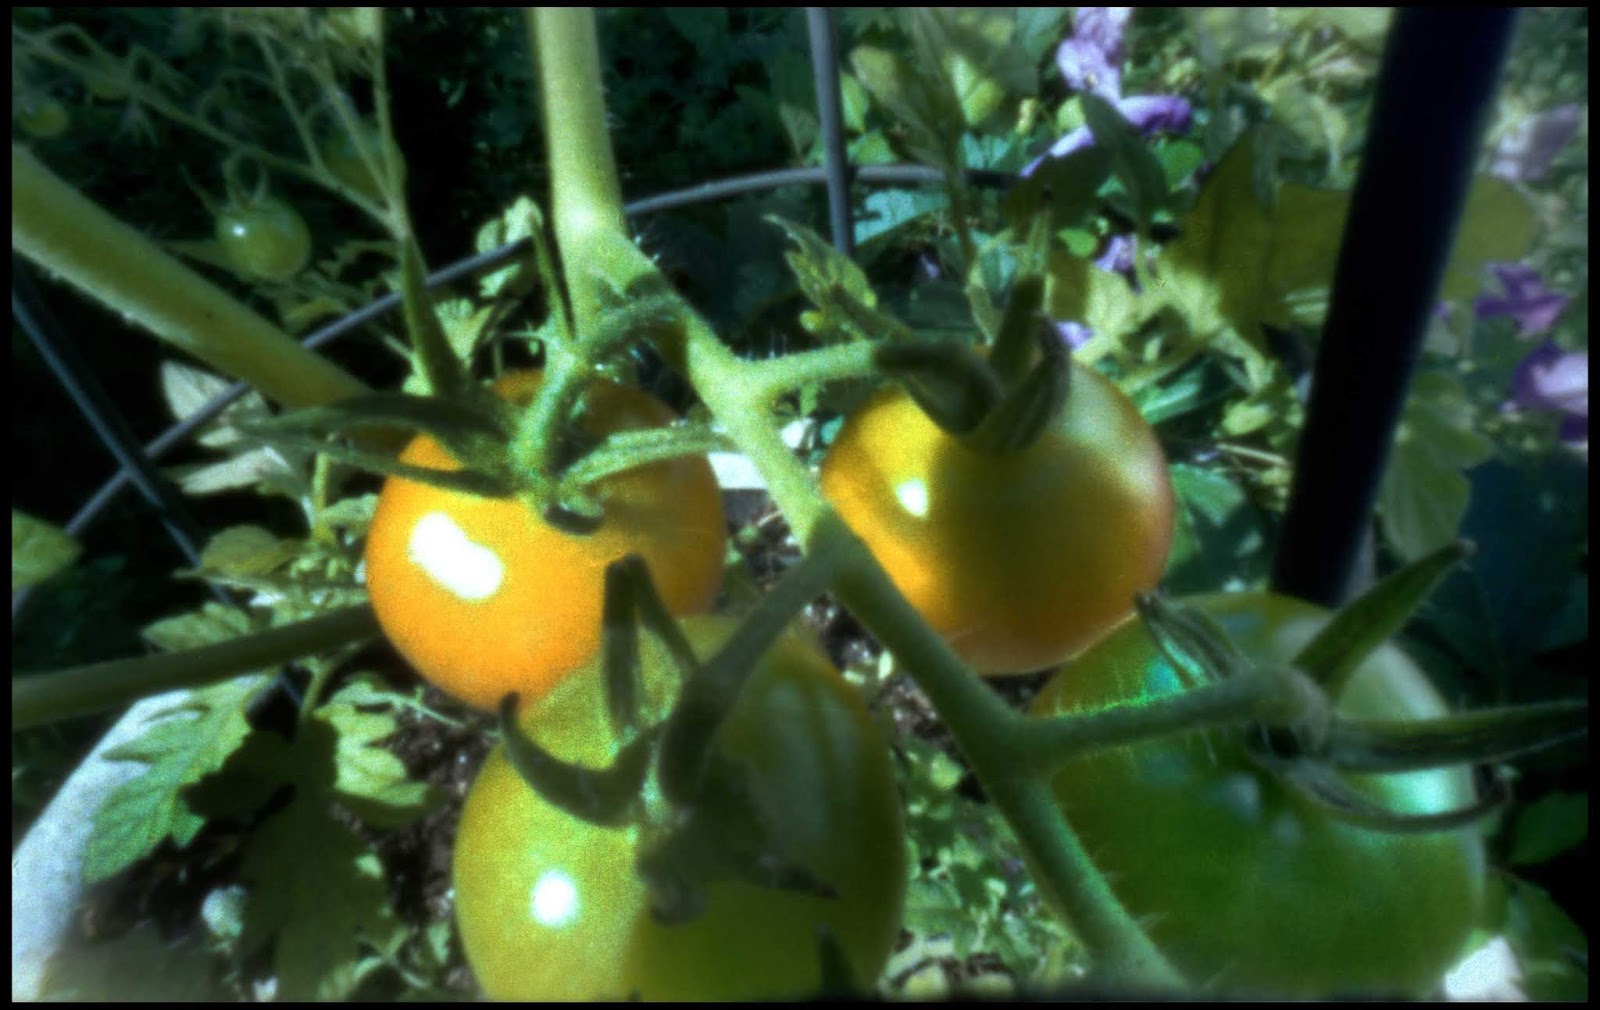
Cherry tomatoes in the middle of a cage in various shades of ripeness,''


An old rose pushing up through the hostas.


And staring down the throat of a yellow lilly.


All with the Populist .15mm pinhole 24mm from 24x36mm frame (I can't wait till they quit referring to Trump's approach as Populism - and it bothers me to see that Stratocaster in the RNC logo)

Tuesday, July 5, 2016

Road Trip: The Southwest.

The southwest of Wisconsin, that is.

Last year for our 40th wedding anniversary, Sarah and I went to Spring Green to go to the American Players Theatre and tour Taliesin. We thought the area was worth another visit.  American Players Theatre has a special goal to make the works of Shakespeare accessible, so this year, we picked The Comedy of Errors. You can't beat Shakespeare for zaniness and I don't think I'm emotionally ready for this year's other Shakespeare selection, King Lear.

We stayed at the House on the Rock Resort (only loosely associated with the House on the Rock Attraction) just across the road, which is in the middle of a golf course.


I don't think Frank Lloyd Wright had anything to do with its design, but they're obviously trying to make it look like it.  On the parking lot side, our room was on ground level, but on the other side, it's four floors over the golf course.


The Theatre is on the top of a hill in the middle of the woods. Here everyone traipses up the hill as the sun sets.


The "lobby" is at the top of the hill...


and the theatre is down the other side.


It's really out in the middle of nowhere, but even on a Thursday night before school was over the place was sold out. I tried to get a picture of the set, but the lady in front of me took her seat not long after I opened the shutter. The stage is completely framed in forest. I only saw one this night, but the bats put on a bit of a show over the second act last year.


There's kind of a picnic atmosphere before the play, so we were one of the last to arrive, but the way the parking lot is configured, that meant we were about the last out. That object in the sky has to be the reflection in the windshield of the car lights behind me. While we waited a monster lighting storm that had been threatening all day to cancel the play, put on a show in the other direction, just to the east.


Just down the road from the theatre and the resort, is Tower Hill State Park.  As you might have guessed from the name, it's a hill that rises up to a bluff overlooking the Wisconsin River Valley.


The park is also a historical site. This area was settled by Europeans originally to mine lead.  A miner is one of the figures on the Wisconsin State flag.  In 1830 a Green Bay entrepreneur noticed the bluff when travelling down the Wisconsin River and got the idea this would be a great place to start the Wisconsin arms industry by making lead shot. At the top of the hill is the smelting house and shot tower.


Shot was made by dripping molten lead down a shaft which surface tension would draw into a perfect sphere before it landed 60 feet below in a tub of water which would instantly re-solidify it. The shot tower, which is actually carved into the hillside along with a couple tunnels, is covered with fencing so no one falls down.  I left the camera laying on it for about 5 minutes, but it was darker than I thought.


Roughly on the way back to Oshkosh is something you might have expected seeing when reading the title of this post, the Natural Bridge State Park.  Wisconsin rocks are made up of several eras worth of sandstones which get carved up by glaciers and other methods of erosion.  Lots of places would probably look like Monument Valley if, as one of my geologist friends used to say, the rocks weren't covered up by all this damn dirt and vegetation.


The park is really unimproved except for a weedy parking lot and single file foot paths. You can't see the bridge until you're nearly on top of it, and there's few other viewpoints. I stuck the tripod as far over the little fence as I could reach to get a little different angle.


The overhanging ledge near the bottom is the site of the earliest human habitation in Wisconsin.


As we continued down the trail looking for a another view of the bridge, we had to step over this huge hole where it looks like something is living now.


We followed the Overlook Trail to it's end in the hope that it meant overlooking the Bridge, but it's just another view of a green Wisconsin Valley.


All with the Populist. .15mm pinhole 24mm from 24x36mm frame.

Friday, July 1, 2016

Developing paper in Caffenol

When the coordinator of the local ArtsCore initiative and I were discussing the pinhole workshop, it came up in conversation that I was developing film in home-made developer and wasn't that kind of a pinholey thing to do. The idea that the ingredients in Caffenol had about the same danger to the environment that the waste water from your clothes washer and dishes have also seemed to work with the theme of the event: "Nature and her Tales."

As I began to panic about what I was actually going to do, I put the idea aside, but I've sort of caught up, and since I needed to practice shooting with 4x5 single shot cameras with paper negatives anyway, I mixed up a liter and gave it a try. (Don't you love it when I mix metric and imperial units of measure).

An immediate impression as I mixed it was that it sure was dark. I've been inquiring of teachers that I knew had conducted workshops and one thing they all emphasize about the response from the students was the magic of watching the image form in the developer.  That's not going to happen with Caffenol.  It's got 40 grams of instant coffee in it. Compared to that cup of coffee in your hand, that's probably about 2 to 4 times stronger. It is essentially opaque. Maybe if you were introducing pinhole to a group that already had experience in the darkroom, it would be interesting, but I'd hate to take any of the magic away from the experience.

But I already had it mixed when I thought of that, so I went ahead anyway.

I didn't do any specific research about it, but I've read a bit about Caffenol and never heard anyone mention developing paper in it.  I remember some internet discussion about using the same developer for paper and film so I thought it would probably work to some extent, but how long would it take to develop it?  Would it stain the paper (it really doesn't stain film)? Would you rate the paper at the same ISO rating? What kind of grey scale would you get?  The biggest caveat about Caffenol was that it tended to create background fogging on films rated 400 or over. I didn't think that would be an issue with paper.

I was using Arista RC Grade 2 Semi-matte, rated at ISO 5 in the f250 workshop camera.  It was a sunny day, and direct sun seemed like an exposure I could repeat fairly reliably for comparison. I even metered it and it agreed with Mr. Pinhole and my standard chart for paper.  A minute.

Somewhat randomly, I decided to start with 2 minute development.

The first negative looked pretty good, but it struck me when I first looked at it that it was a bit underdeveloped. The blacks looked like they could get darker but, I could get a pretty good scan from it.


The next two negatives seemed a little lighter than I'd like, but I couldn't tell if it was a case of a difference in exposure or something to do with the development.

The fourth picture, I decided to go with what I thought would be a lower contrast subject. It was in the shade so the exposure was a lot longer, but I didn't measure it, I just guessed (based on the standard chart) that it was about three stops lower. After two minutes in the caffenol, I pulled it out of the developer and it looked really thin, and although I tell everyone to wait to judge a negative until you look at it in room light, I decided to see if more development time would bring out more detail, so I left it for another two minutes. The extra development time definitely made a difference. The blacks are blacker, but I thought I was starting to see staining on the unexposed portions.

I still got a pretty good scan out of it

.

I realized that by taking a photograph and developing it and then going back out when the lighting conditions were changing, I wasn't going to get any real comparison.  So I loaded three of the workshop cameras and took three successive shots at the same exposure, and then developed them for 2, 3, and 4 minutes.

The two minute does look a little underdeveloped to me.  The three minute seemed pretty good, and the four minute seemed to have even better shadow detail, but the highlights seemed to getting a bit blocked up.

My best scans of the three.


The first is a little lacking in shadow detail, but despite the differences in the negatives, the last two look pretty good to me. If I was going to do this regularly, I'd probably pick the middle one - three minutes.

So, can you develop paper in Caffenol? Yes. Does it affect the response of the paper? Not really too much. Does it stain the paper?  Yes, a little, and the longer developments showed a little more staining, but it still wasn't too bad, and might have controlled contrast a little.

I'm still not going to use it in the workshop in order to let the participants watch the image form, but it would work.

Monday, June 27, 2016

The easy way

I have presented our old college friends, Gene and Laura, with portfolios of black and white prints, beginning with their wedding, for many years.  They include all sorts of events and just mundane visits. For example, I had been trying to get their elder daughter to take my picture with my Canon F1 ever since she was born, and on New Years Eve when she was three and a half, she suddenly took over the camera and shot a whole roll. They had a fortieth wedding anniversary party last Sunday at the bar where they met that we had all hung out at for years  I tell you all this to justify what I did last weekend.  I shot a few rolls of Tri-X with a lens.

How that's relevant to a pinhole blog is that I had about 10 frames left when we got back to Oshkosh. I have never put a pinhole on a 35mm SLR nor have I ever shot black and white 35mm film with a pinhole.  So this seemed to be the opportunity.

I have to say this is the easiest way to do Pinhole I've come across.  It could be pretty cheap too.  I already have three of them but I found numerous fairly good SLR's including a Nikkormat on eBay for $10. The shutter doesn't really need to work very well.  All you really need is that it works on Bulb.

I lost the body cap that came with my F1 probably the minute I put the first lens on.  The closest thing I had was the lens cap from my 10x50 binoculars. It doesn't fit at all so I had to tape it on with 3M #235. It only took a few seconds and it's on there pretty solidly.

I was really surprised that the pinhole ended up being 50mm from the film plane.  I had always imagined these to be wider angle, but I never had really thought about it.  Quite a bit different from the Populist I'm used to at 24mm.  (The lens I had on it last weekend was my beloved Canon FD 20mm f2.8)

I made a pinhole in some beverage can aluminum by drilling just the tip of a #10 needle on a table top.  The initial hole was about .18mm. I gave the needle a gentle twist or two and enlarged it to .26mm.  Mr. Pinhole says .298mm is optimal for this distance.  Close enough.

Professional SLR's are some hefty chunks of steel, but I never felt about this camera that way, but with the pinhole on it it strikes me as really heavy and clumsy.  It's just under two pounds.  The Populist is just under three ounces.

I was kind of surprised you could see anything at all through the viewfinder. Except for a completely sun-lit scene, it's still pretty useless though.

Another kind of surprise was there's no other good way of viewfinding, other that just trying to center your subject in the frame.  Horizontally, the angles on the pentaprism roughly point at the angle of the 50mm distance, but vertically you just kind of have to guess.

I guess you could have predicted that I got some more tightly framed shots than I was planning. Not particularly level either.


I did a little better with the entrance to the garden.


I couldn't find a cable release.  (BTW, our local camera store which is jam packed with every kind of accessory you could imagine, doesn't carry cable releases.) I kept forgetting that you had to keep the shutter held down on Bulb and blew a few exposures that way.  It also meant I had to be within an arms length of the camera.

Here I am gripping the black film can from a roll of Tri-X left over from Gene and Laura's 25th wedding anniversary in 2001 that I found in the bottom of the camera bag.


When I'm desperate to get some film shot quickly, I always end up with a self portrait, but having to hold down the shutter meant it had to be pretty close-up,


It is kind of handy that you know how much film you have left.  I may play with it with that outdated roll of Tri-X as long as I had to buy a whole quart of developer.

Wednesday, June 22, 2016

Existing containers episode 3: Boxes.

Paper boxes of one sort or another are everywhere.

I have to start out by saying a lot of forms of boxes are not easy to make cameras out of.  Almost any kind of one piece box with a fold down lid with a tab that inserts into the front are going to be almost impossible to make light-proof without taping over part of where the top closes when you put the paper in.  I really don't like cameras that need to be sealed with tape every time you load them. Paper boxes especially are going to get damaged removing tape.

Also boxes that are not very stiff and don't fit tightly into the lid, or distort somewhat when you place the lid on are going to be prone to light leaks.

The best boxes are those which are fairly rigid cardstock and have the lid which is just as tall as the interior.  My favorite lately are Oaks Candy Boxes.


The one on the left is the one pound and on the right is the two pound.

The cardstock is white which is always a little suspect for opacity, but with a layer of flat black paint they were completely light-proof.  Notice that I painted the bottom not only on the inside, but also on the outside, so where they're together, the joint between them is black on both sides. You want to make it as hard  as possible for the sun to sneak in.

The one pound box is 4 x 8 inches and the two pound is 5 x 10 inches.  They're both two inches deep, so they're pretty wide angle for these image sizes.

Here's the image from the two pound box,


One aspect of wide image formats with short distances to the pinhole that's obvious here is vignetting. With lenses this term usually refers to part of the image being shadowed by part of the opening, but with pinhole it more commonly refers to the fact that there's a significant exposure gradient toward the edges of the image.  In a wide box like this the edges of the paper are quite a bit farther away from the pinhole than the center is. The amount of light a lens or pinhole transmits is generally indicated by it's f ratio: focal length divided by the size of the opening. The larger the number, the less light it transmits. Focal length is an inappropriate term for pinhole because there's no focusing going on, but I'll use it for simplicity's sake. In pinhole the distance from the pinhole to the paper gives the same sort of geometric results as focal length of a lens does.

I used a half millimeter pinhole, so the two pound box, at a point directly under the pinhole, is f100 (50mm/.5mm).  The right and left edges of the paper are almost six inches (152mm) away from the pinhole and therefore f305.  Thats nine times less light reaching the paper. In addition, from that perspective, the pinhole becomes a foreshortened ellipse reducing it's area and reducing the amount of light even more.  The end result is that the picture fades to black before it reaches the edge.  We could argue whether that's good or bad – some people like it and some don't.

It also exhibits a characteristic of all wide angle objectives.  Perspective is stretched out so things seem farther away from the camera and each other than they appear to your eye. To get this picture I had the tripod in the middle of the street and had to cut short the exposure when an SUV unexpected came around the corner. It's always a good idea to get closer than you think you need to with a really wide angle camera

But you don't necessarily have to put a sheet of paper the entire size of the box in there.  You probably want the paper to be centered directly under the pinhole.  On the one pound box I glued a couple strips of foamcore to make a depression exactly 4x5 so it was easy to make sure it was in exactly the right spot and if the camera was level, the paper inside was too.

Oaks has a big sign in their store that says they don't sell empty boxes with the Oaks branding already printed on them, so my wife and I made the sacrifice and ate the candy so I could make the cameras to show you.