

This Bumble Bear Compact 45 was built to further refine the way the film reels are kept parallel.
The winder inserted into it keeps the top of the film reel from wandering, but with my cardboard cameras the bottom tends to twist outward and backward when pulling the film. Most cameras have some kind of clip or axle at the bottom. I tried this with the original Evil Cube but I kept losing the small parts that did that. In the Evil Cube template there's a double layer of cardstock, the same width as the flange on a 120 reel that stops the bottom from moving. Spacers added to the top make sure the reel stays down against it. This was a really simple, easy to make solution but once or twice it failed so I started looking for a better method.

The new idea was to make a part which would attach to the top and bottom and create a bay that would restrict the movement of the reel, but would still allow film to pass to the other side.

The first attempt was done by just measuring and drawing the new part out with a pencil. Then I laid it out in Inkscape when I did the Compact 45 template. It's a little tricky because this space is triangular with three sides of different widths. Originally there were only the three sides, but it turned out to be much easier to put together with that fourth one. It also needs a tab at the bottom that folds in under the film reel or it might slide under this new piece if the glue came a little loose. To complicate things, either side is a mirror image of the other. Notice that I marked them A and B so I remembered which side went where.

It's a little bit of a hassle to put together and a hard-to-clamp situation. To get it in the right place, it's necessary to hinge it to the back of the film holder with tape (which you're eventually going to cover with tape anyway), then apply glue on the inside, top, bottom, and flap, then clamp it with a rubber band and a clothes pin. I also covered the flap under the reel with tape so it didn't come loose from the film reel being inserted over it. I used glue because there's not much area at the top and bottom and sheet adhesive can't be squeegeed to stick well in this arrangement

It works but it's still a little fussy to load and wind. Here's a short video on the technique.
Note that in a couple places in that demo, I mix up "take-up" and "supply" but the video is of course right. I also forgot to mention to tighten the supply reel after advancing to make sure the film is flat in the back of the image chamber. I'm a pretty terrible on-camera personality and I find video editing extremely tedious. I first learned video editing on half-inch open reel VTR's. Digitally, I started with Final Cut Pro. iMovie is like doing it with gloves on.
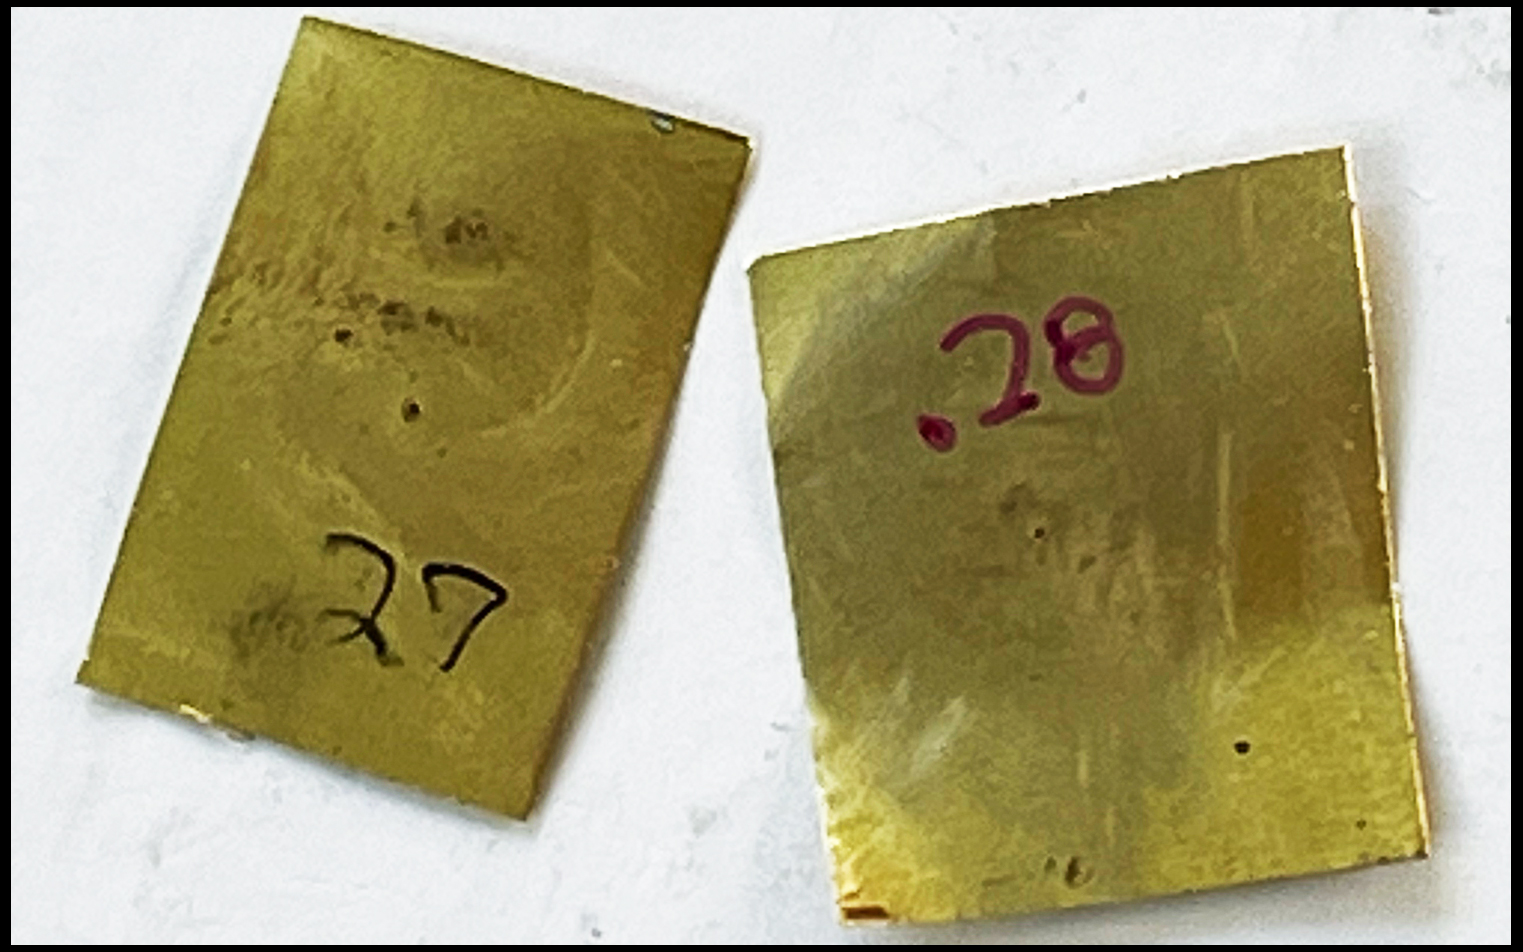
There was a .27mm and a .23mm pinhole in my stash. I just enlarged the smaller one with the tip of the needle to get it to .28mm. It usually ends up too large when I try this but this time hit the exact optimal size necessary.
There are no viewfinder beads on the back. The film format is a smidge less than the height of the box so you can just use the back corners to line up with the front beads,

I had noticed that the side of this old firehouse had been dressed up recently and was often dappled by the trees on it's south side. Thinking there was no one there, I rode into the parking lot and when it was too late to leave unnoticed, saw that a couple in lawn chairs were reading in the shade. I asked it they minded if I photographed their building. They lived in the first floor apartment and we had a nice conversation about the restored building and the attractive lighting.

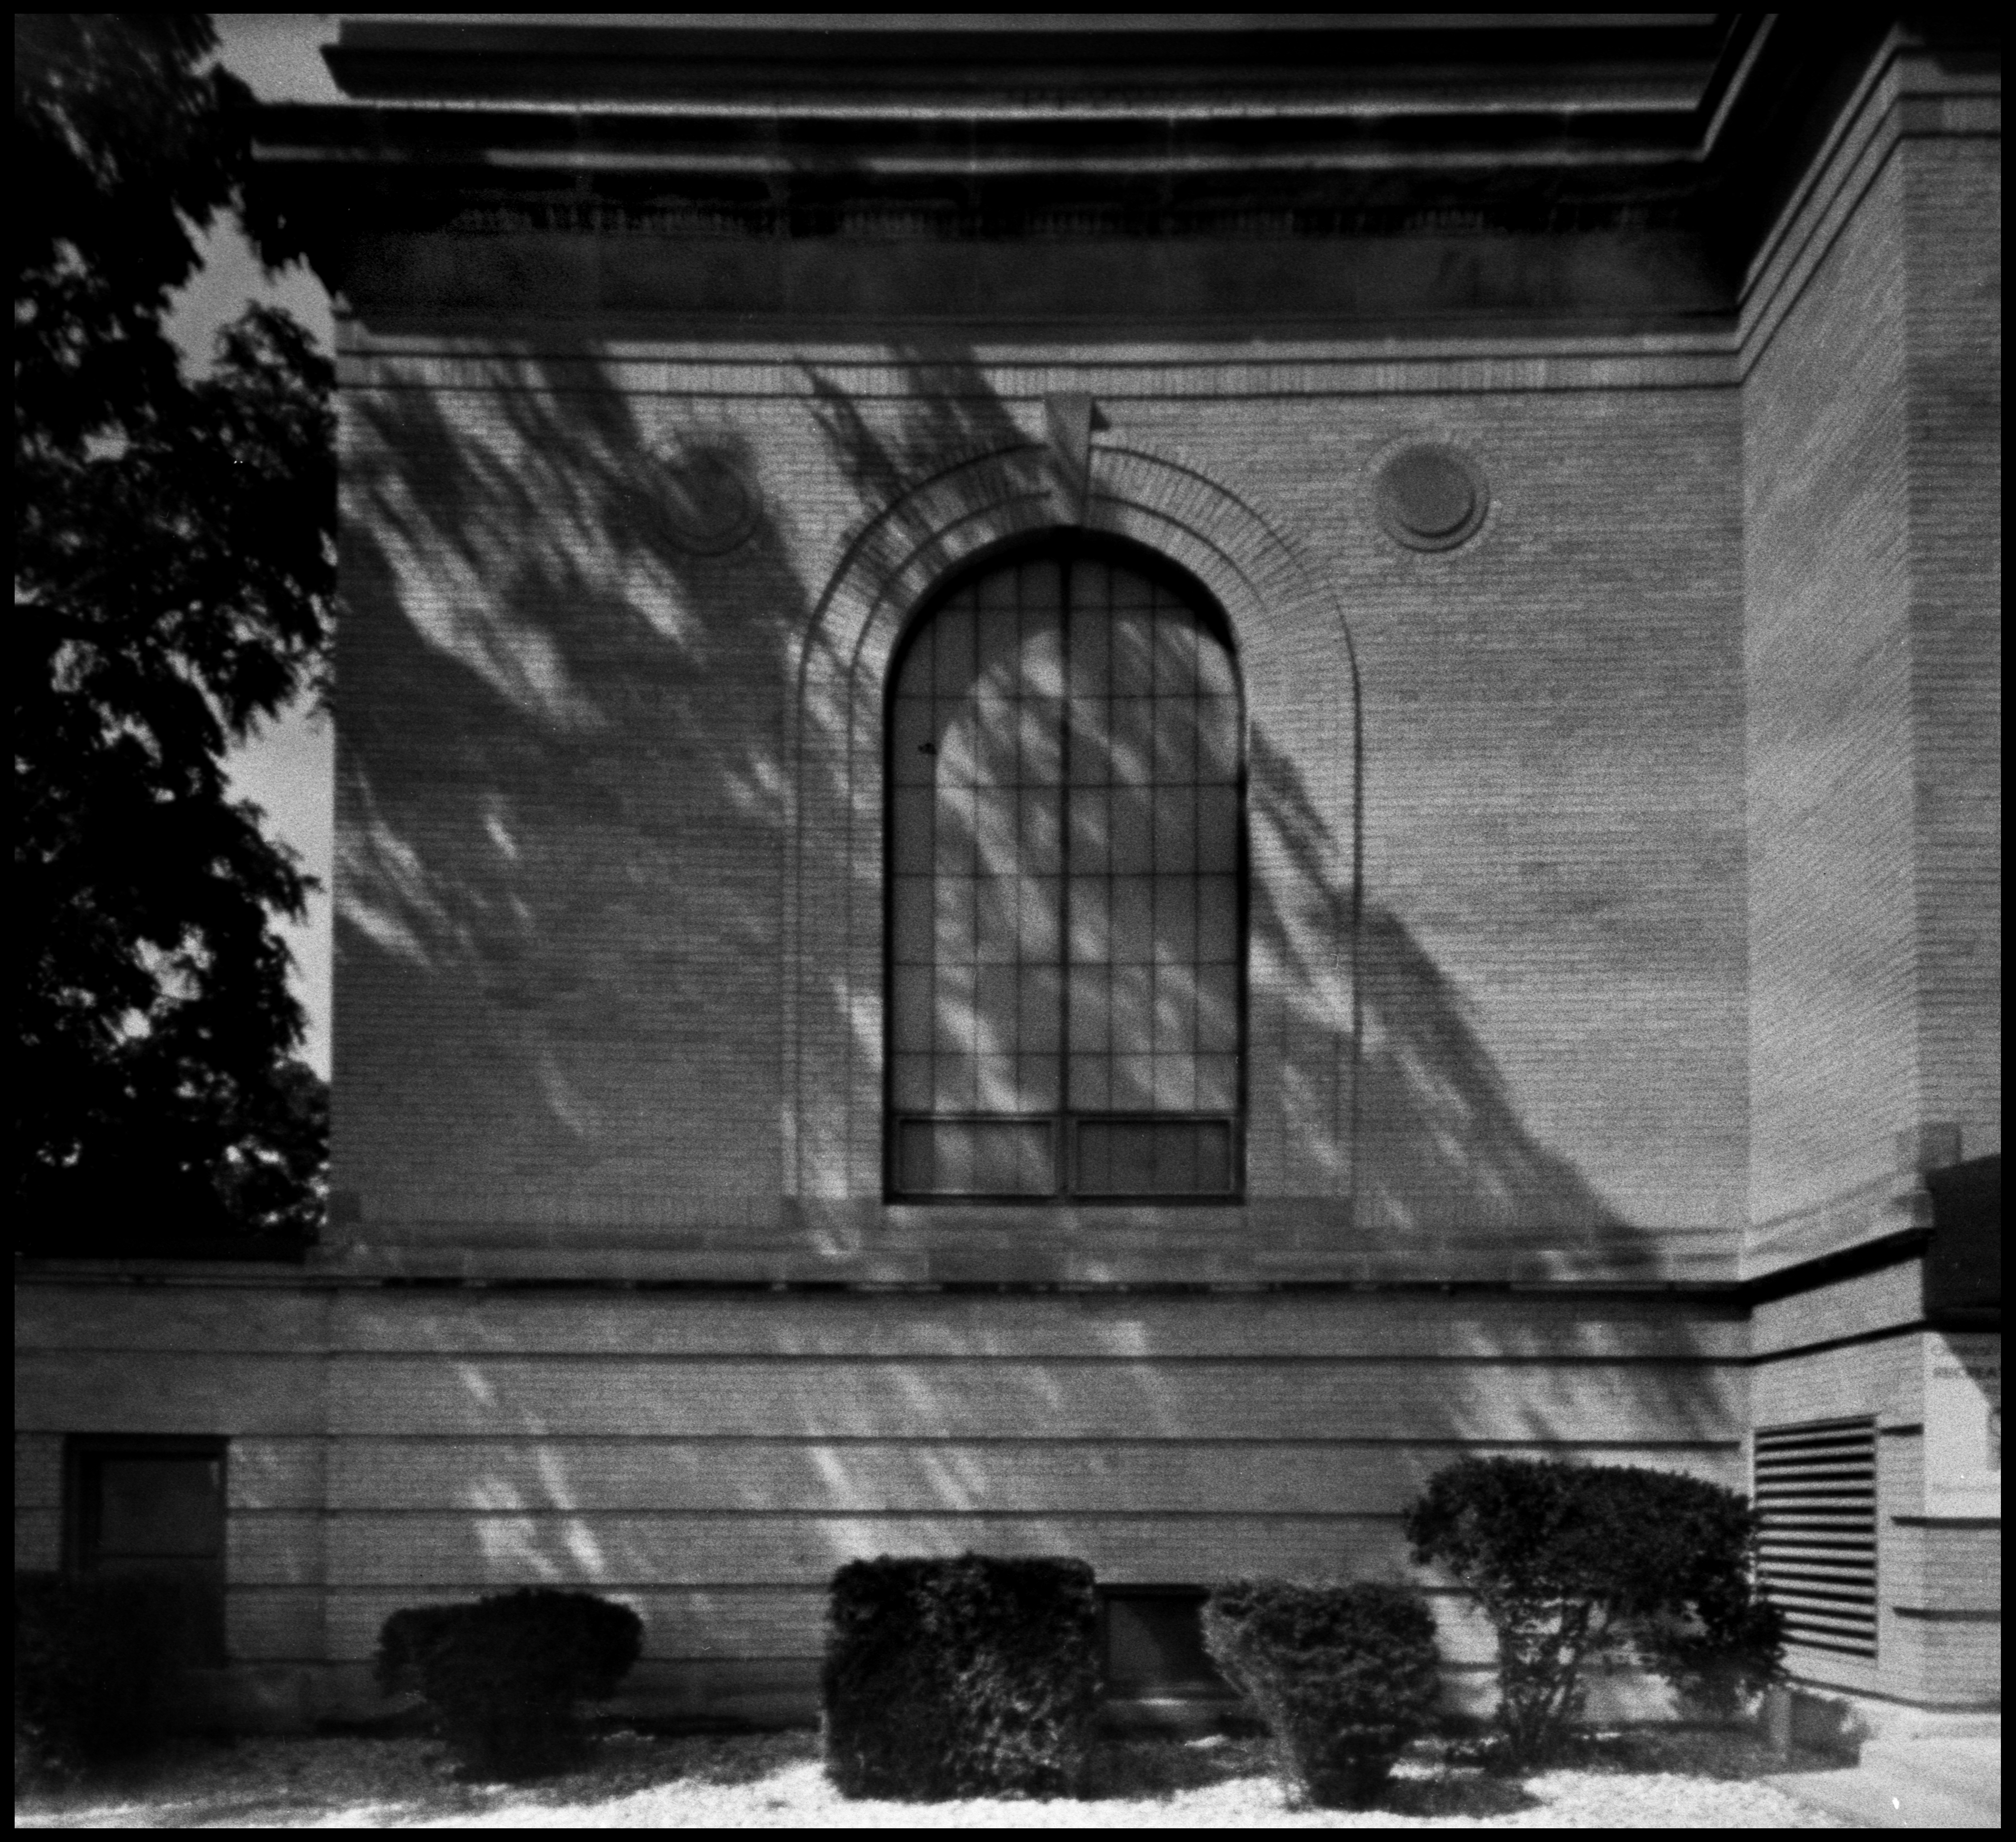
More tree filtered lighting on the Time Cinema stopped me on Main Street. There is a street sign which prevented me from getting any farther back. This is what can happen if you don't retighten the film after advancing to the next frame.

A decorative door and window on Market Street across from Opera Square

I was on my own for lunch that day so I got a hot dog and sat in the shade in Roe Park.

Recently, I wondered if architects deliberately arranged things to make faces on the sides of buildings. It may be the engineers.

Tree silhouettes on the wall of the Rec Gym.
More trees acting like a gobo on the side of the courthouse

The Paine Art Center has been having an exhibition with the pretentious title, The Nature of Light. It consists of pierced-metal geometric solids scattered about the house and garden, but no mention of Newton or Maxwell. The cardboard from which the camera is made is pretty dark grey stuff, but there is a bit of white printing on it which may have contributed to the light stripe across the top. It's since gotten a severe black spray enamel treatment on the inside.

At night these are illuminated from inside with the patterns projected all around, with various other light sources washed around the trees. One is large enough to enter and in sunlight the patterns cover the interior.

The night show is pretty interesting. The whole thing had a Kubrickian feel to it.

I still have a few weeks to work on the Macro Challenge for the Fox Valley Photography Group. The scar on my knee might be interesting,

The Bumble Bear has a .27mm pinhole on the axis and a .28mm pinhole 15mm above the axis, 45mm from a 6x6cm frame. The film is Arista.edu 100 semi-stand developed in caffenol. The beer is from Lakefront Brewery in Milwaukee.
No comments:
Post a Comment