In a workshop with two very gracious, enthusiastic and patient participants at the Trout Museum of Art, I experienced a series of firsts.
Joanne is a retired library assistant who had started in photography documenting library collections of objects with a 110 camera and never had used a camera that wasn't completely automatic. She now volunteers in a hospital and takes photographs which she pairs with inspirational quotes and has an agreement with a greeting card company to publish them.
John is a recently graduated engineer. He bought a Minolta SLR a few years ago and has been taking pictures with color film, but had never processed his own negatives. Ironically, Failure Analyst Engineer is his current job title. Can you see where I'm going with this?
The previous Saturday had gone well. Both made excellent cameras. I overlooked warning them about avoiding the possibly unreliable cardboard with white printing, but we made special efforts to light proof the cameras with opaque tape. They are regular 120 Populists, Joanne's is a 45mm and John's 30mm, no customization. There was no noticable issue of not being light tight, sort of.
It was notable they both drilled excellent pinholes within a couple hundredths of a millimeter of optimum, on the first try.

The first order of business the second week was to load the film onto the reels in a changing bag. I have never done this in public before. Until a few weeks ago, I had never done it at all. I've spent plenty of time with my arms in a changing bag but never to load film on a reel. I did a few rolls to practice and then found a dummy roll and practiced more, including just before the session started. The first roll went well, but I had to stop talking and concentrate to get the film inserted in the slot of the Yankee tanks I was using. The second roll, I removed the film from the backing paper and then discovered I had put the tank between the outer and inner layer of the changing bag. I've never done that before. Luckily, I had brought a spare for them to look at while I was in the bag. I had dramatically turned off the room lights so it was fairly dim. With John's help, I slid my hand out of the bag as he pinched the sleeve and we put in the spare tank and reel back through it, curving the sleeve over the edge of a table. Then silently with great concentration wound the film on the reel. Next was mixing the caffenol. I had already drawn the liter of water and measured the temperature as 69 degrees F. Then, as I do everytime I mix caffenol, divided the recipe in half for a single roll of film as I read it to them to measure and mix. We developed the film in half-strength developer! Twenty-three grams of coffee (9 teaspoons) in a liter is just as opaque as the full recipe. I thought the negatives looked thin but were easily recoverable with the simple editing on the iPad. I didn't realize what I'd done until the next morning, ironically while I was weighing coffee grounds. This could be concerning for a septuagenarian. I was commiserating with someone about stage fright recently. We both observed that once the event started, it went away as you operated according to the programmed script. My brain must have copied a few lines of code and forgot to change a parameter for the new application.
But there's more. That turned out to not be the worst.
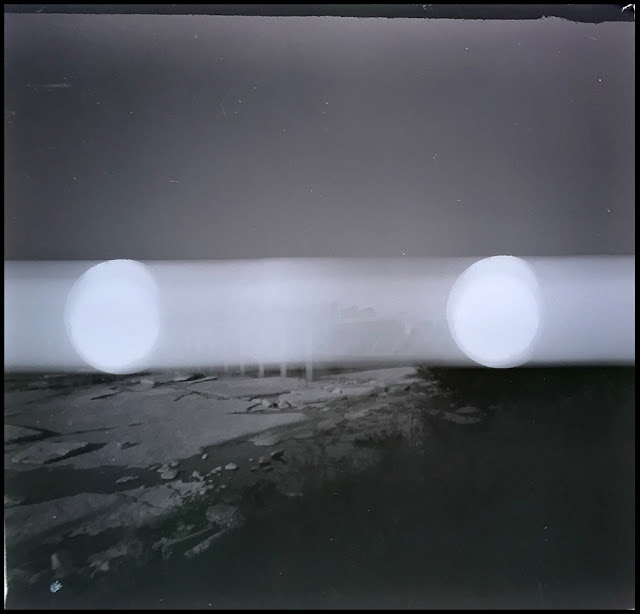
When we got the film off the reel, we discovered that John's film, beginning on the second frame, had a grey streak down the middle exactly the same width as the counter hole with the occasional circular hot spot, slightly doubled, at random spaces along the negatives. This is with a handmade pinhole camera, so when he had the counter shutter open he would have to pause to loosen the supply occasionally as he advanced to the next number.
I watched him do this after frames two and three and saw the numbers on the backing paper. He did this in the shade. The counter hole was otherwise always covered by a shutter exactly like every camera I’ve ever made. I once saw a number appear on the negative this way, but it had been left open in the direct sun for several minutes. I've also left them open in the sun and got nothing.
It’s as if he opened the counter shutter but there was no backing paper at all. But the backing paper looks perfectly normal. The negatives look like the film was flat against the image plane, ergo not separated from the backing paper.
This was with a 120 roll of Ilford FP4+ which I watched him take out of the box and foil, load into the camera and advance to the first frame.
The streak did not appear in the first frame. There's what looks like a legitimate light leak in the bottom i.e. the top of the camera. This is with a 90° angle of view camera and I think it just might be some sunlit ornamental grasses in a planter he didn't imagine moved this much during the exposure. In any event, it doesn't show up in any of the other exposures.
The hotspots were kind of at random, consistent with the idea that he paused occasionally while winding the film. Some of these look tilted but that's just the negative being slightly tilted under the iPad camera used to capture the file. The streak is perfectly straight from it's beginning to the end of the film
The negatives are a little thin, easily editable back to the full range, but the streak and the dots kind of freaked out the automatic iPad camera so the files were even flatter than they could have been.
Too bad, it looks like a nice pinhole.
Could this be a manufacturing flaw? I’ve heard complaints in the past but I can’t imagine how it would happen. I had a rough streak down the middle of a couple of frames once with a roll of FP4+ and later found a slit down the middle of the backing paper. But this one looks fine.
Here's the backing paper of the suspect roll held against my iphone flashlight, my normal test of opacity. I can't see a hint of translucence.
For comparison, here is the backing paper from the other participant, again with the iPhone flashlight held against it. Those negatives looked completely normal except for the under-development.
The inside of the camera looks well constructed and seems adequately light tight from looking at the un-streaked parts of the negative.
I offered this conundrum to several Facebook groups concerned with pinhole and hand-made cameras. The responses came in two groups.
First, since the camera didn't have a red filter in front of the counter hole, that allowed enough light to penetrate the backing paper and create the streaks and the spots during winding. I and others have made thousands of exposures in exactly the same conditions without the red window and
never a hint of a streak or spot.
Red windows were introduced when most general purpose films were orthochromatic. They weren't very sensitive to red, so the filter over the counter hole was very effective. With modern panchromatic films the red window merely absorbs about two stops. Later cameras included a swiveling shutter over them. I hear more complaints about the red filter making it hard to see the recently light-grey marks on Kodak and Ilford films. Some people have removed them, putting tape over the hole, wishing they'd done it years earlier, without any mention of light marking the film through the naked counter hole when they advanced the film.
The second group said they have no idea what happened but noted that you
gotta run another roll of film of a different batch or type through that camera. There was another roll of film that the museum had purchased. At the end of the workshop, I offered it to John, which he accepted. We have since agreed that he will expose the film and then mail it and the camera to me and I will develop it and expose a different kind of film in the camera.
Watch this space.
The most, but just barely plausible explanation was that the manufacturing flaw was: that although the backing paper looks opaque to us, it's almost transparent to UV and infrared light, which the film is slightly more sensitive to than our eyes are.
Still another notable learning experience occured for me. The museum's three inch high light tables needed unstable cardboard platforms to place the iPads at the right height to capture the negatives. My flat LED light box was much easier to use with a lower platform. With only two participants, I had plenty of iPads. With the app Artist's Lightbox, I could use one to backlight the negatives and use the more stable lower platform. I tried this out prior to the session, and even used a picture captured with the iPad backlight to demonstrate editing an image.
Joanne's negatives, that weren't affected by the magical streak, were captured with the iPad backlighting it.
It wasn't until I printed the file at letter-size that I realized that the iPad camera had imaged the pixels of the backlighting screen, including hints of the three color pixel groups behind the monochromatic negative. My initial reactions was that it softened the image. On later reflection I realized that the pattern created by the colored pixels and the silver grain was kind of a unique textured image.
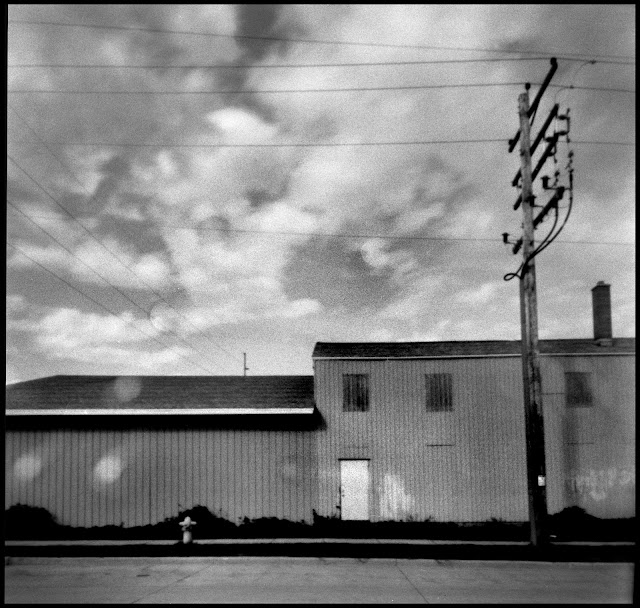
Here's one of her pictures.
A detail at high resolution
We had talked about how I would have made the pictures a little higher contrast, but she thought they looked right like this. I also find myself wanting to rotate the picture so it was level. If you think of this compared to a Cubist painting it's a pretty good composition. Recently I'd attended a talk on Street Photography where the presenter advised to forget the rules about level cameras and introduce some dynamics to the image with a tilted horizon. Well Nick, what an old fuddy duddy you are.


